Grinder34
Track Monkey
Oil pickups are a great mod, but seem rather daunting. I've done this twice in the past few weeks and gotten it down pretty well. The mod is now relatively simple and even quick (4.5 hours last time, and probably could've gone faster). The key is HAVING THE RIGHT TOOLS. A second person is pretty much a "must."
What we used:
Jack
Jack stands.
12 mm socket
14 mm deep socket
14 mm wrench
17 mm socket
10 mm 1/4 drive socket
(OPTIONAL: An integrated 10mm socket and u-joint combo would work better, but is not necessary. Link)
6+" 1/4 drive extension
1/4 u-joint
1/4 drive socket wrench
(OPTIONAL) 1/4" drive nut-driver
MINI Hammer
Regular Hammer
Crowbar
Putty knife (this one makes ALL the difference. Long and thin is best in this case)
Oil catch device.
Lights
Rags
exhaust gaskets (optional, i just re-use old ones).
NEW OIL AND OIL FILTERS
RTV Gray or Fujibond
Step 1:
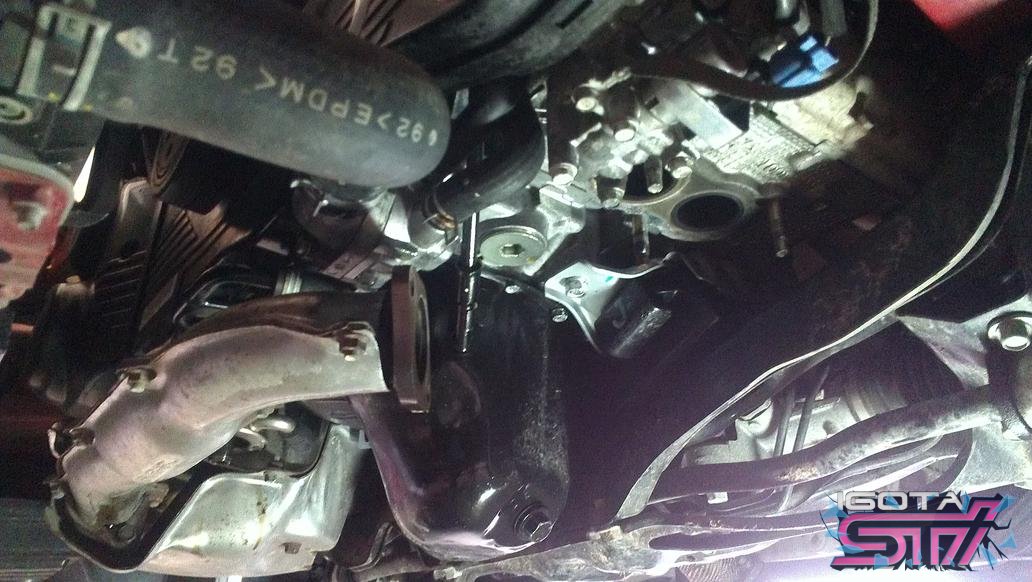
Remove plastic undertray. Then remove driver's side exhaust heat shield and collector. I dont have the pictures for this, but it'll involve taking 3x 12mm bolts out of the heat shield. Next you'll have 3x 14 mm nuts attaching the collector to the block and 2x 14mm bolt/nut attaching the collector to the cross-pipe. Here is what everything looks like after this step:
Step 2:
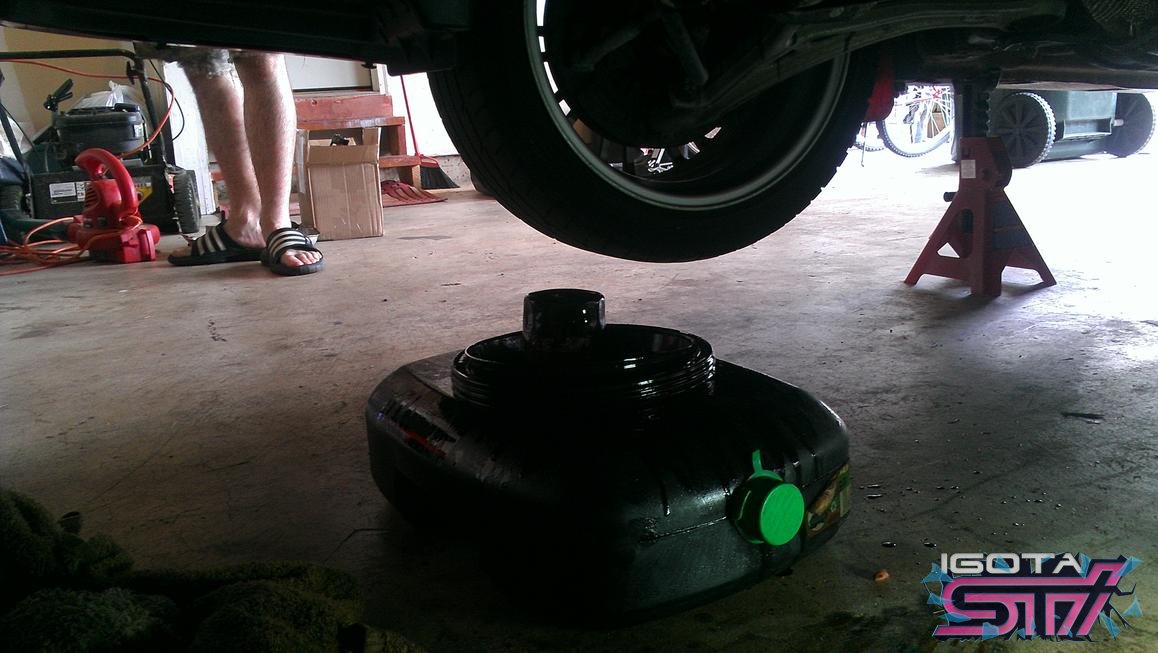
Drain the oil. Remove the 17mm drain plug and catch all the oil. I'd also remove (and not replace) the oil filter at this time. You'll want the oil cap off, and to remove the dip stick.
Step 3:
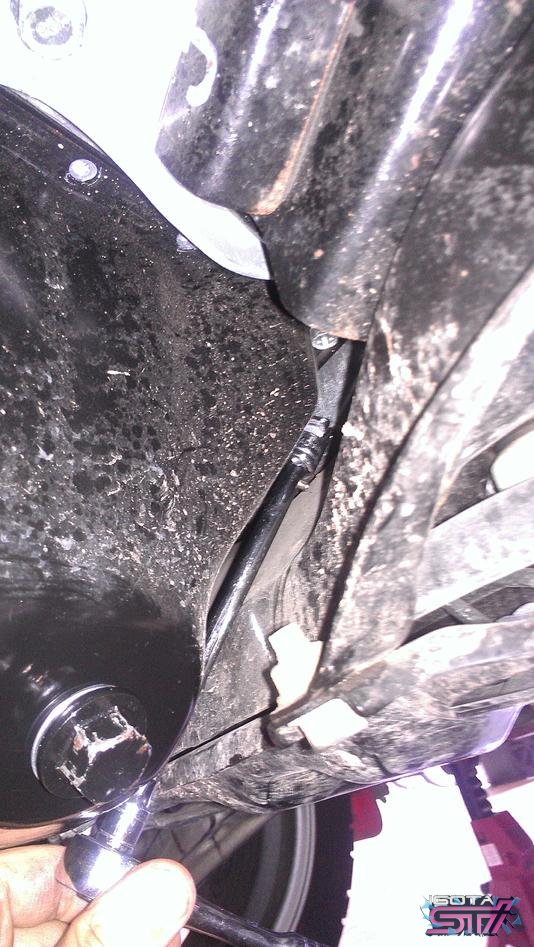
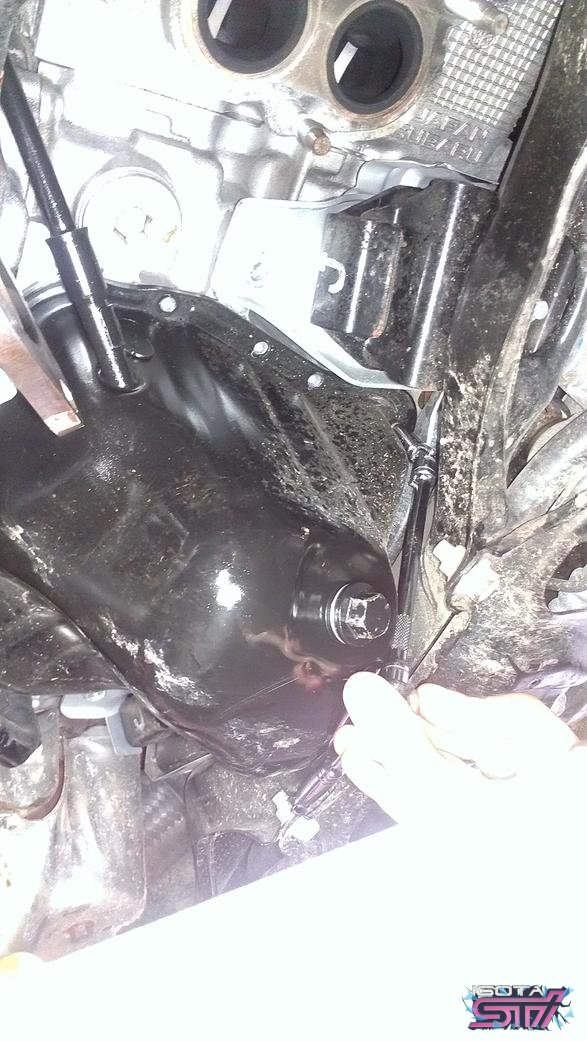
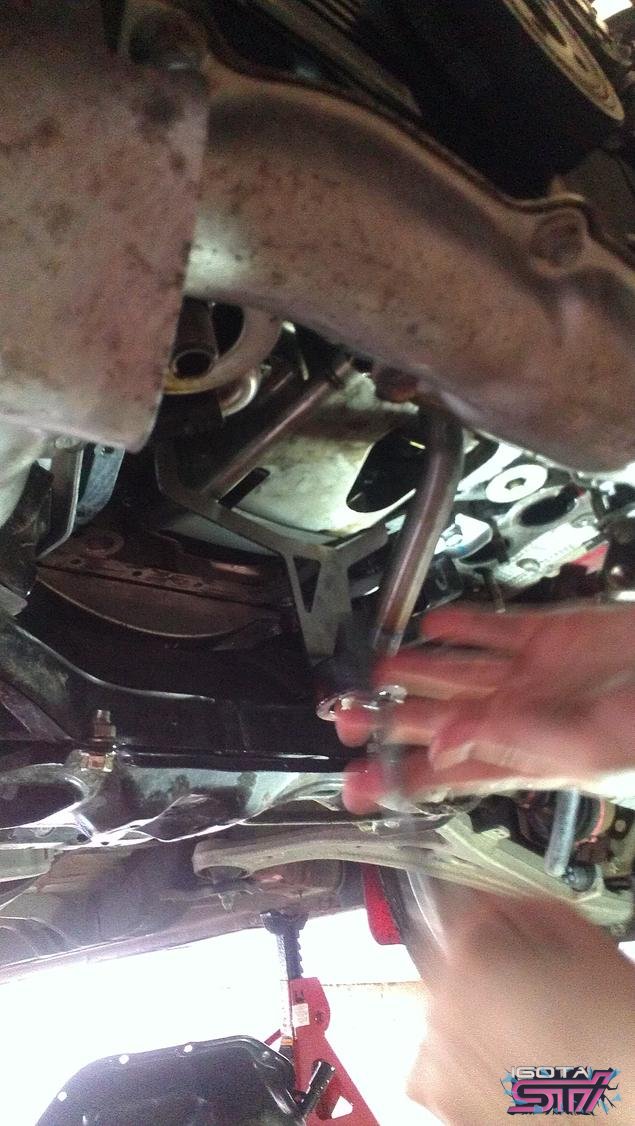
Remove the 10mm bolts from around the oil pan. All but 4 should be easy to reach. For the last four, you need your 1/4 drive, extension, and u-joint. The assembly should fit between the suframe/jack plate and the pan with a reasonable fit:
Step 4:
This is where you have to use the putty knife to break the seal between the block and the pan. In this step there should be no prying, just pounding. You will only be able to get to the driver's side, but try to get the putty knife between the pan and head in as many places as possible. I pounded it in with the mini hammer. As always, be careful. You dont want to scrape/bend anything. The putty knife should go in easily, although pulling it out might be more difficult. Once you've worked your way around as much as possible, you'll move on to bigger devices in the next step.
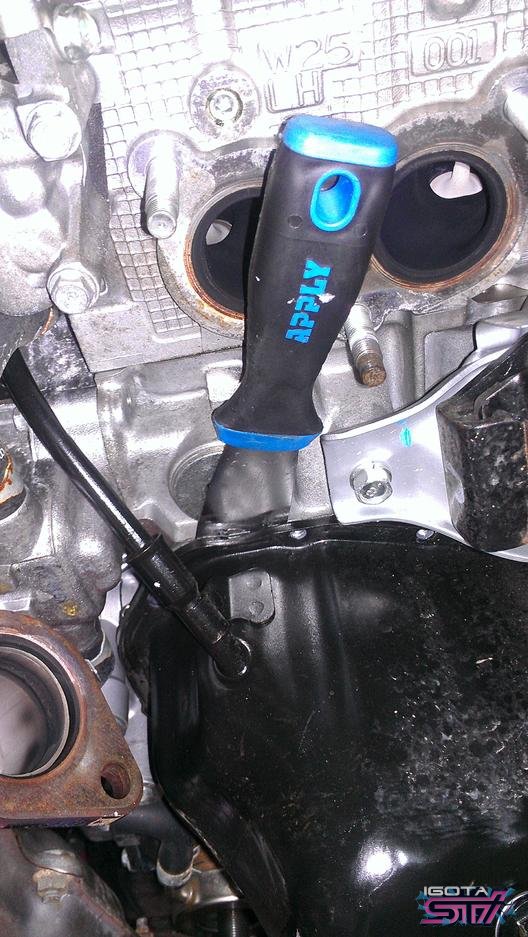
Step 5:
You need to use your judgment, but at this point i started using THIN, BROAD screw drivers to get in there. DONT FORCE ANYTHING. You should be slowly opening up a bit more space between block and pan. I used two screwdrivers to allow my crowbar into the space, and then the crowbar to allow my regular hammer in. On both of my pickup installs, i found that pryng with the hammer didn't bend the pan much and was what finally broke the seal. DONT BE STUPID. You can screw things up badly by forcing things, scraping, etc.
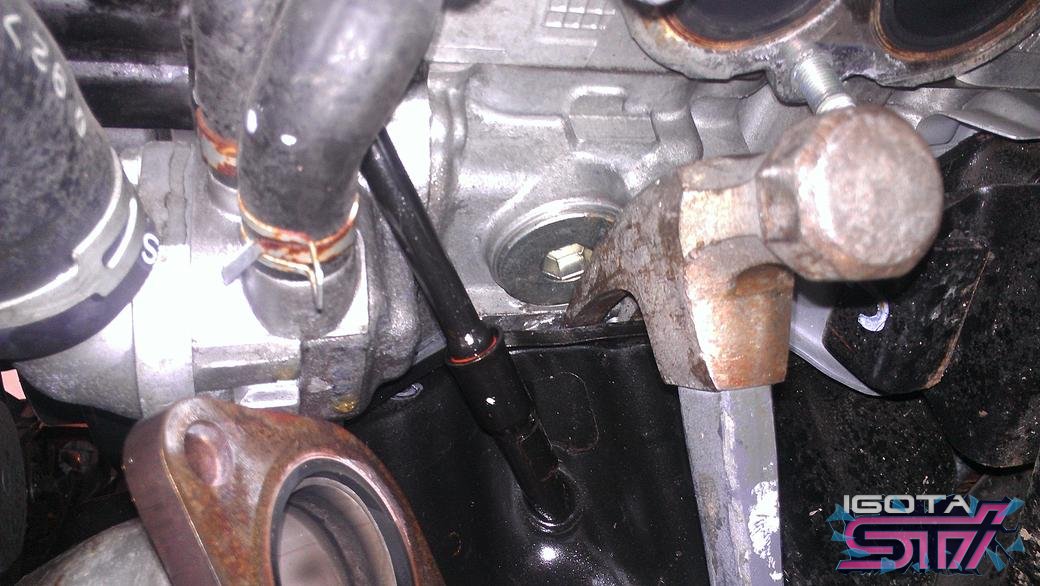
Step 6:
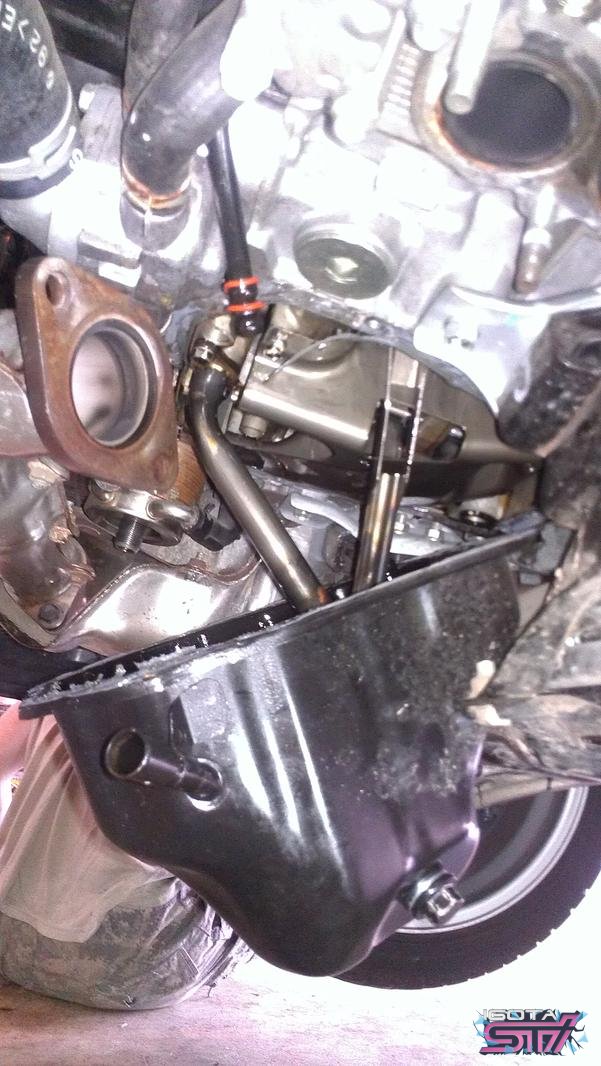
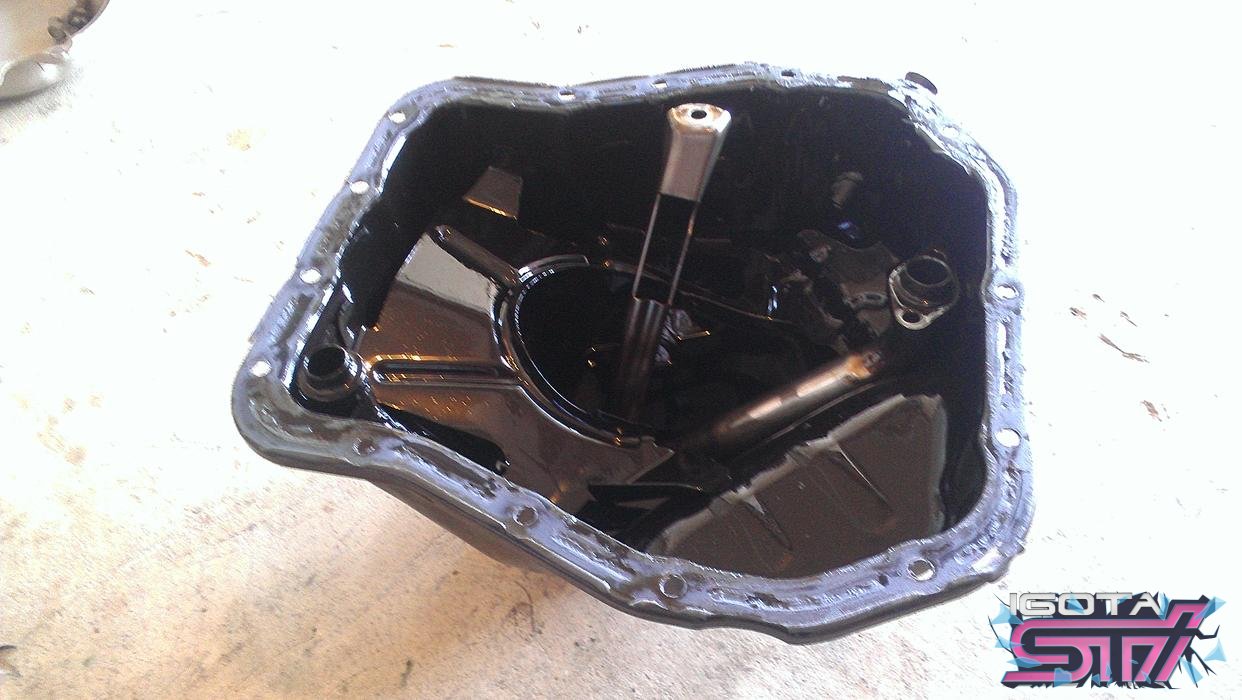
Loosen the pickup. On both the installs, the pan could not be fully removed at this point, as it was caught on the pickup. With your 10mm wrench, try to at least loosen (if not remove) the THREE 10 mm bolts attaching the pickup to the bottom of the engine. This will allow you to remove the pickup and pan.
Step 7:
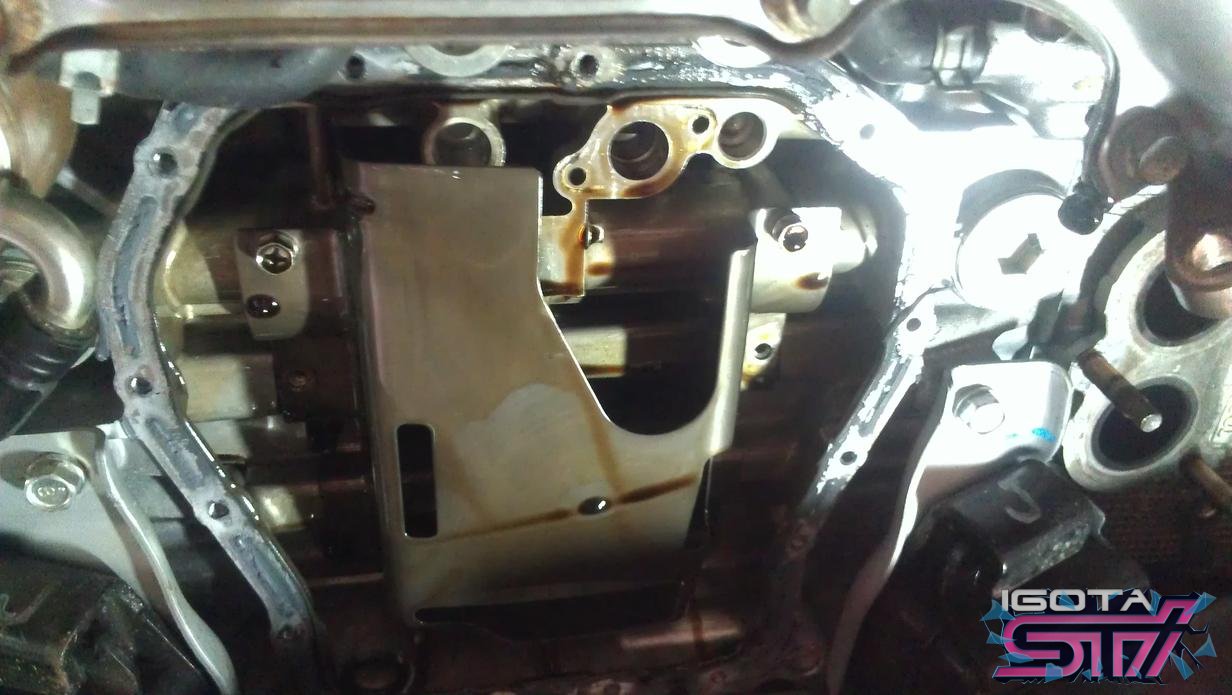
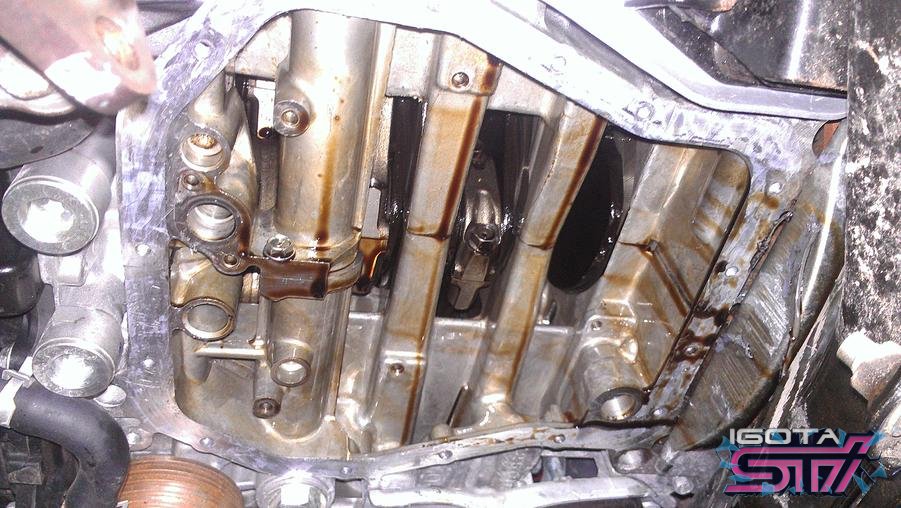
Remove the oil baffle from the engine. There should be 5 remaining 10mm bolts. This step will cause more oil to fall. You need to do this to make step 9 (cleaning off the pan) easier.
Step 8:
There should be a rubber gasket either on the pan or on the block that goes to the tube you can see in the picture above (lower right corner). There should also be some sort of o-ring that came with the OEM pickup. Make sure that's not attached to the engine either.
Step 9:
You've finished with the hard part! Now you need to clean up the mating surfaces of the block and pan. Use the putty knife to scrape off all the remaining gasket material. If you bent the lip of the pan during removal, do your best to straighten it out now.
Step 10:
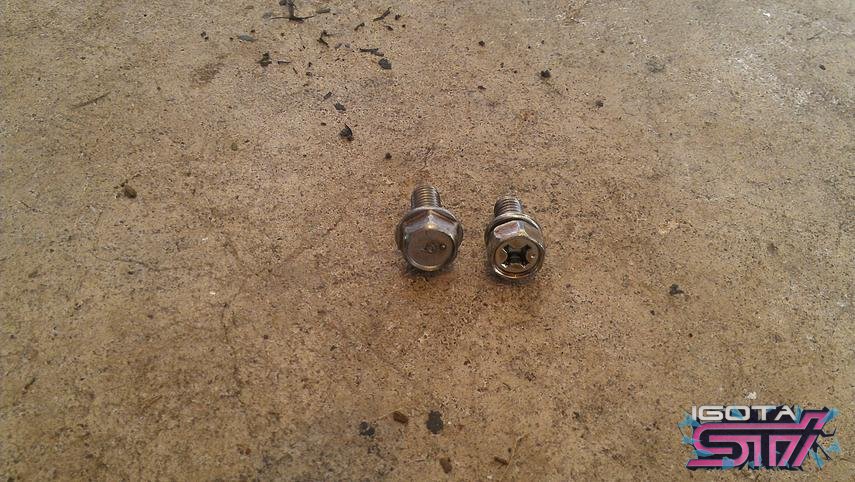
Install the baffle and new pickup, MAKING SURE TO USE THE NEW O-RING! There are two bolt types. There should be 6 of one kind and two of another. The 2 different ones are for the thick flange of the pickup, and the other 6 go to the pickup supports and baffle.
Step 11:
Test fit the pan. For one install, the pan would not clear the pickup, so we had to loosen the pickup, put the pan mostly on, then tighten down the pickup (much like the reverse of step 6). On the other car, the pan had no problem clearing the pickup. At this point you'll also want to look at the dipstick tube. There are two o-rings, so make sure they're there and in the right position. The tube should align with the pan, as in the next step you'll have to make sure the tube goes into the pan at the same time the pan is going on.
Step 12:
Install the pan with RTV. You can apply RTV to the pan's mating surface or to the block. I think it's easier to do to the block, but do whatever works best for you. Dont slather it on, but make sure there's enough to fill voids and make a complete seal. As the pan is going on, make sure the dip stick tube goes in its place.
Step 13:
Re-insert all the 10mm bolts. I'd start at the front. Those last four bolts will be a pain, just like last time. The outer two of the back four are visible. The inner two cannot be seen, and my fingers weren't long enough to feel them. But the spacing across the back is equal, and blind luck will get the screw to line up eventually. We found the 1/4" nut driver was better for getting the bolts started than the full socket wrench setup, but do whatever works for you!
Step 14: Re-install the exhaust, heat shield, dipstick, oil cap, etc...
Step 15: Replace plastic undertray.
Step 16: Let dry/set for a few hours. Overnight would be best.
Step 17: fill your oil!!!!!!! Dont forget the filter
What we used:
Jack
Jack stands.
12 mm socket
14 mm deep socket
14 mm wrench
17 mm socket
10 mm 1/4 drive socket
(OPTIONAL: An integrated 10mm socket and u-joint combo would work better, but is not necessary. Link)
6+" 1/4 drive extension
1/4 u-joint
1/4 drive socket wrench
(OPTIONAL) 1/4" drive nut-driver
MINI Hammer
Regular Hammer
Crowbar
Putty knife (this one makes ALL the difference. Long and thin is best in this case)
Oil catch device.
Lights
Rags
exhaust gaskets (optional, i just re-use old ones).
NEW OIL AND OIL FILTERS
RTV Gray or Fujibond
Step 1:
Remove plastic undertray. Then remove driver's side exhaust heat shield and collector. I dont have the pictures for this, but it'll involve taking 3x 12mm bolts out of the heat shield. Next you'll have 3x 14 mm nuts attaching the collector to the block and 2x 14mm bolt/nut attaching the collector to the cross-pipe. Here is what everything looks like after this step:
Step 2:
Drain the oil. Remove the 17mm drain plug and catch all the oil. I'd also remove (and not replace) the oil filter at this time. You'll want the oil cap off, and to remove the dip stick.
Step 3:
Remove the 10mm bolts from around the oil pan. All but 4 should be easy to reach. For the last four, you need your 1/4 drive, extension, and u-joint. The assembly should fit between the suframe/jack plate and the pan with a reasonable fit:
Step 4:
This is where you have to use the putty knife to break the seal between the block and the pan. In this step there should be no prying, just pounding. You will only be able to get to the driver's side, but try to get the putty knife between the pan and head in as many places as possible. I pounded it in with the mini hammer. As always, be careful. You dont want to scrape/bend anything. The putty knife should go in easily, although pulling it out might be more difficult. Once you've worked your way around as much as possible, you'll move on to bigger devices in the next step.
Step 5:
You need to use your judgment, but at this point i started using THIN, BROAD screw drivers to get in there. DONT FORCE ANYTHING. You should be slowly opening up a bit more space between block and pan. I used two screwdrivers to allow my crowbar into the space, and then the crowbar to allow my regular hammer in. On both of my pickup installs, i found that pryng with the hammer didn't bend the pan much and was what finally broke the seal. DONT BE STUPID. You can screw things up badly by forcing things, scraping, etc.
Step 6:
Loosen the pickup. On both the installs, the pan could not be fully removed at this point, as it was caught on the pickup. With your 10mm wrench, try to at least loosen (if not remove) the THREE 10 mm bolts attaching the pickup to the bottom of the engine. This will allow you to remove the pickup and pan.
Step 7:
Remove the oil baffle from the engine. There should be 5 remaining 10mm bolts. This step will cause more oil to fall. You need to do this to make step 9 (cleaning off the pan) easier.
Step 8:
There should be a rubber gasket either on the pan or on the block that goes to the tube you can see in the picture above (lower right corner). There should also be some sort of o-ring that came with the OEM pickup. Make sure that's not attached to the engine either.
Step 9:
You've finished with the hard part! Now you need to clean up the mating surfaces of the block and pan. Use the putty knife to scrape off all the remaining gasket material. If you bent the lip of the pan during removal, do your best to straighten it out now.
Step 10:
Install the baffle and new pickup, MAKING SURE TO USE THE NEW O-RING! There are two bolt types. There should be 6 of one kind and two of another. The 2 different ones are for the thick flange of the pickup, and the other 6 go to the pickup supports and baffle.
Step 11:
Test fit the pan. For one install, the pan would not clear the pickup, so we had to loosen the pickup, put the pan mostly on, then tighten down the pickup (much like the reverse of step 6). On the other car, the pan had no problem clearing the pickup. At this point you'll also want to look at the dipstick tube. There are two o-rings, so make sure they're there and in the right position. The tube should align with the pan, as in the next step you'll have to make sure the tube goes into the pan at the same time the pan is going on.
Step 12:
Install the pan with RTV. You can apply RTV to the pan's mating surface or to the block. I think it's easier to do to the block, but do whatever works best for you. Dont slather it on, but make sure there's enough to fill voids and make a complete seal. As the pan is going on, make sure the dip stick tube goes in its place.
Step 13:
Re-insert all the 10mm bolts. I'd start at the front. Those last four bolts will be a pain, just like last time. The outer two of the back four are visible. The inner two cannot be seen, and my fingers weren't long enough to feel them. But the spacing across the back is equal, and blind luck will get the screw to line up eventually. We found the 1/4" nut driver was better for getting the bolts started than the full socket wrench setup, but do whatever works for you!
Step 14: Re-install the exhaust, heat shield, dipstick, oil cap, etc...
Step 15: Replace plastic undertray.
Step 16: Let dry/set for a few hours. Overnight would be best.
Step 17: fill your oil!!!!!!! Dont forget the filter
Last edited:


