TK-421
New member
Welcome to another How To by TK-421
Welcome to the Newbie Section. Many of you reading this are new STi owners. Whether this is your first Subaru or first STi, you've probably got yourself a laundry list of questions and your wondering where to go. This section was thought of especially for you. There will be information here to help the new owners with your questions and hopefully answer the majority of them. So without further ado, let's get to it shall we?
Today I will be covering how to change your engine oil and oil filter
Things you will need to accomplish this task are:
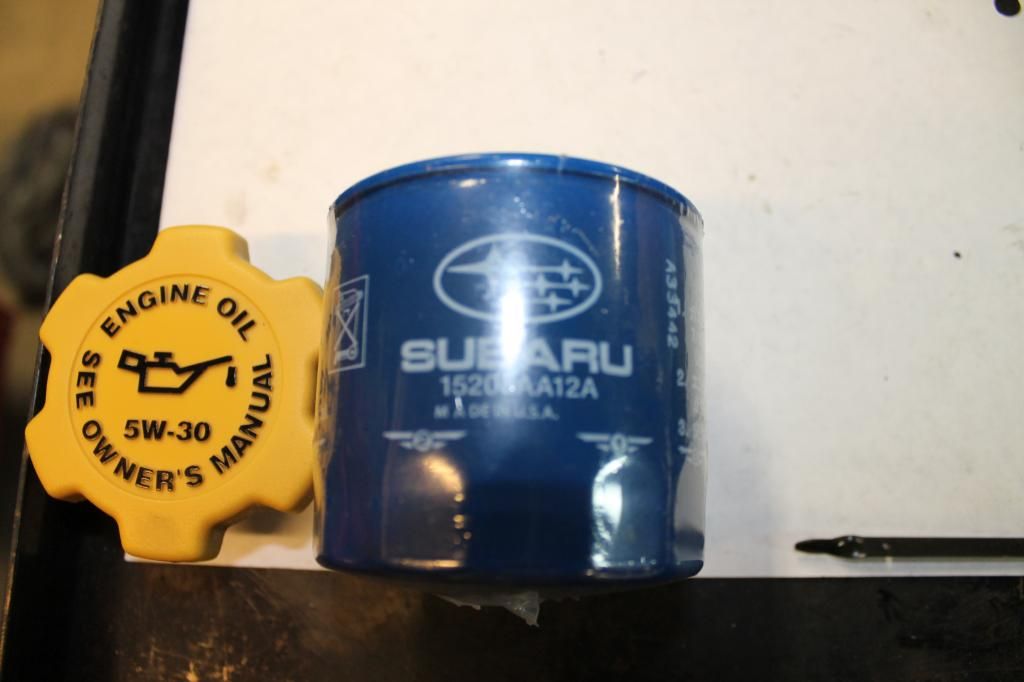
A New Oil Filter (I use OEM Subaru Oil Filters in all of my cars and my customers cars unless provided with a different filter)
Subaru Part # 15208AA12A
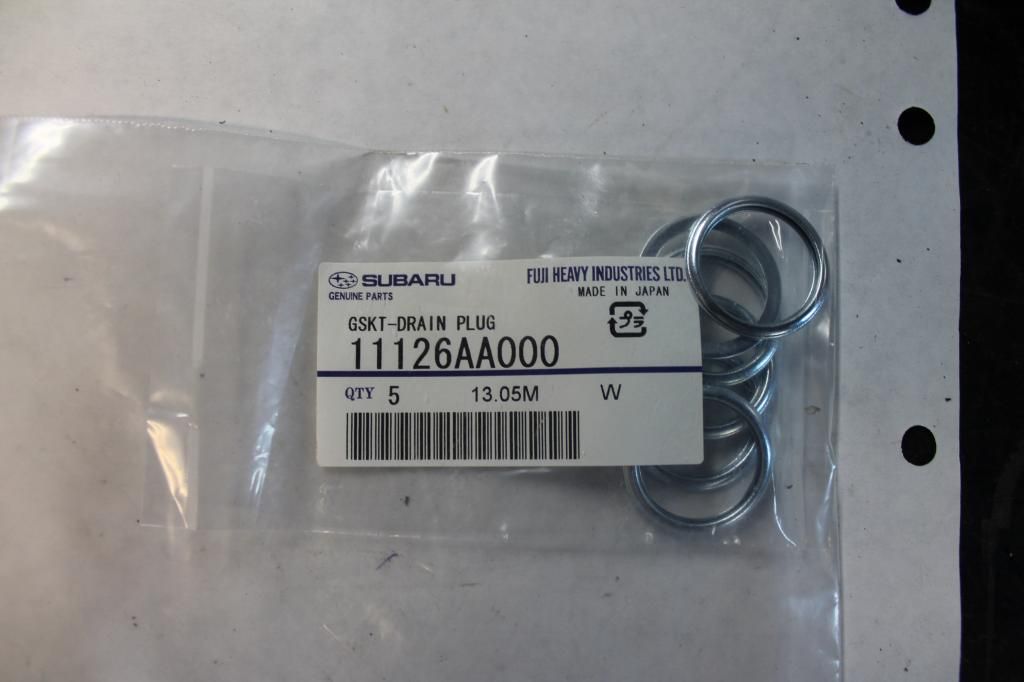
A New Oil Drain Plug Crush Washer (Again I use Subaru OEM Parts)
Subaru OEM Part # 11126AA000
And Your Choice Of Engine Oil
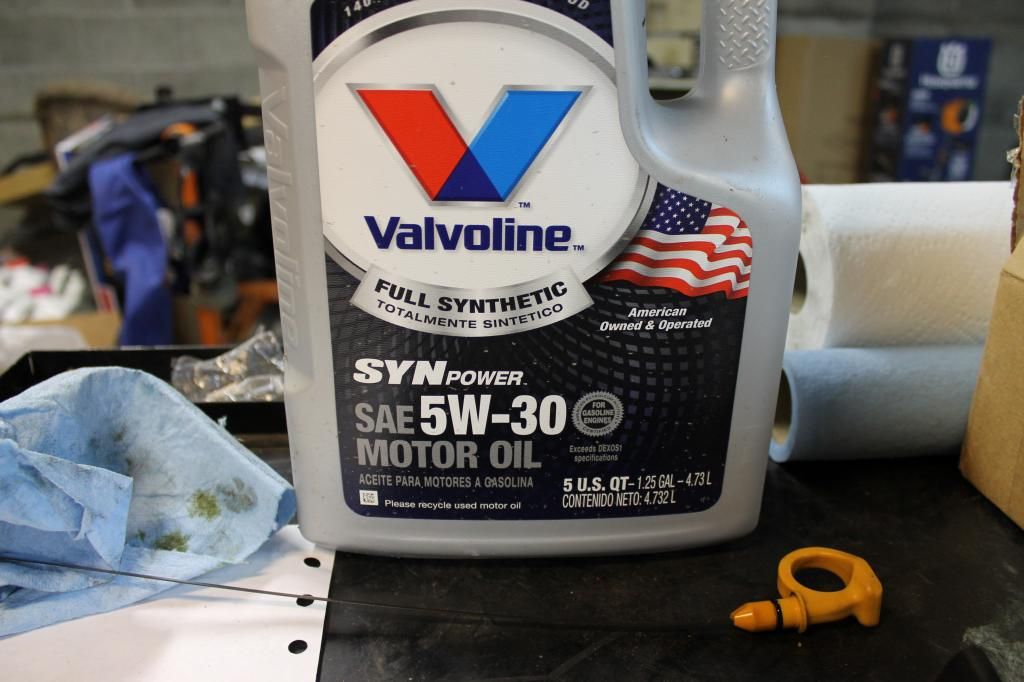
Now lets go over the tools your going to need to accomplish this.
Your going to need:
A 3/8" drive ratchet
17mm socket
12mm socket
Flat Head Screwdriver
Oil Filter Wrench ( we will go over the different types in just a minute )
And a Oil Catch Pan or Equivalent
Optional Tools include
Clip Removal Pliers
3/8" Drive Torque Wrench
17mm Combination Wrench
These 3 Tools are Optional due to the fact that not everyone has these tools available to use. As I do this for a living, I have many tools at my disposal that the average owner would not use or own.
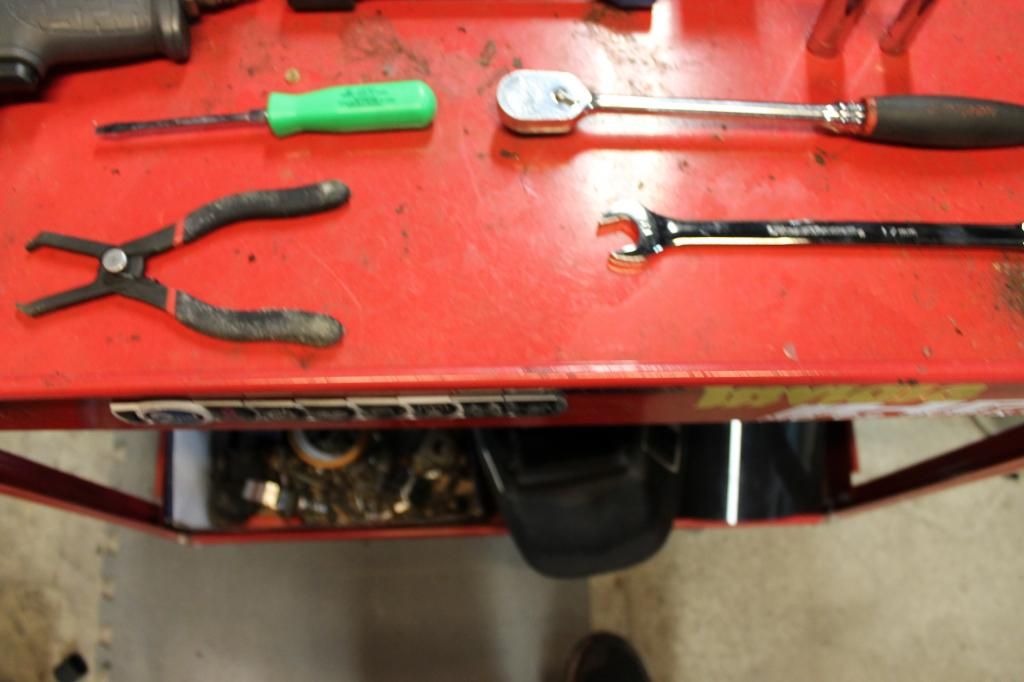
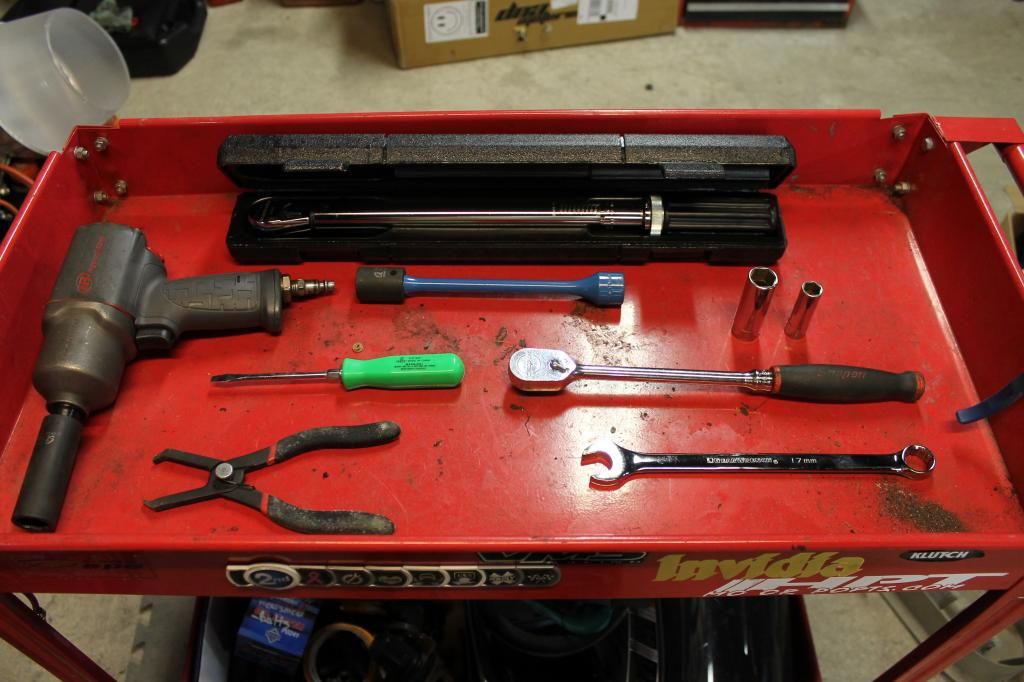
Please note that the Air Impact is for another job, not for this oil change. You Never EVER want to use any power tools/Air Tools with a job like this.
Now above I talked about Oil Filter Wrenches, lets go over the different types of filter wrenches. There are 4 main types, A Cup Style, Claw Style, Band Style and Special Pliers that are made for removing oil filters.
I own two of the four types
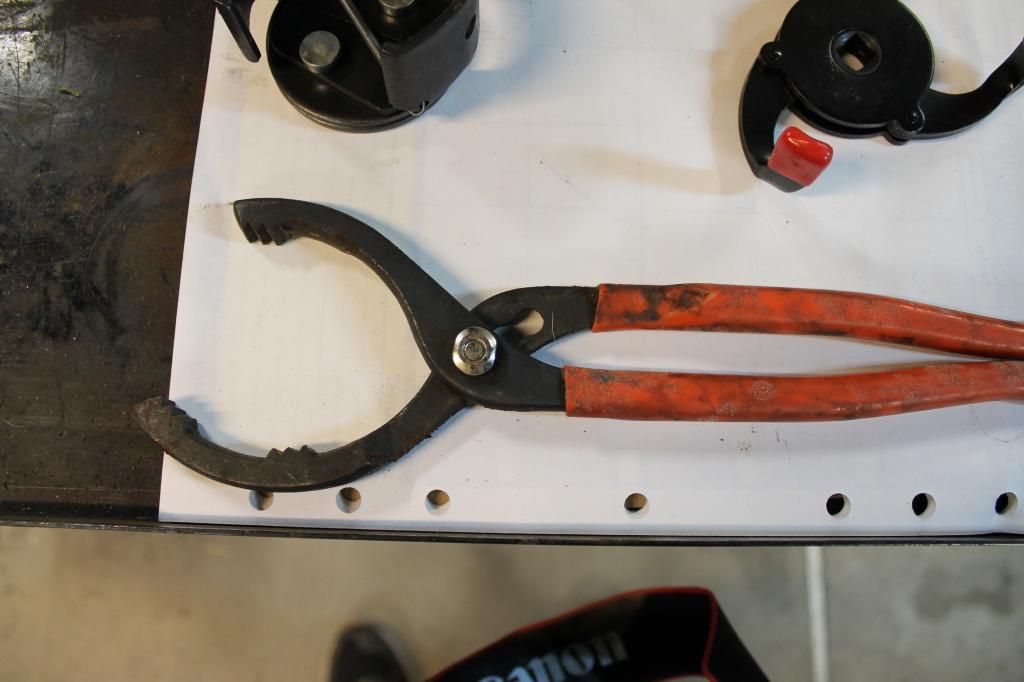
These are the special pliers
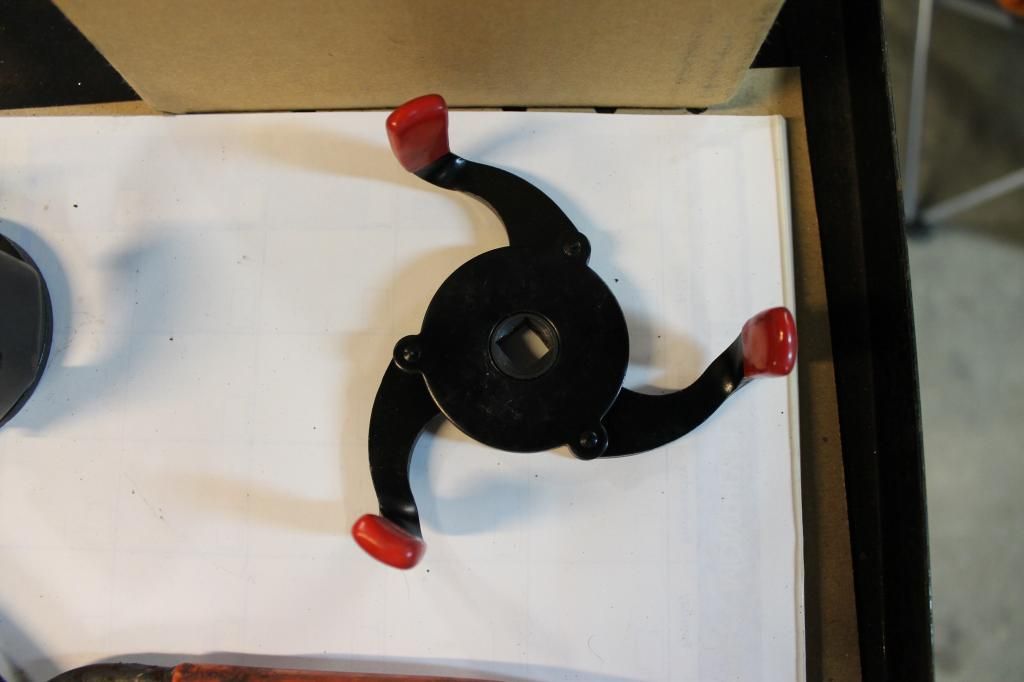
This is one style of "Jaw Style" Wrench that fits on the square drive end of a 3/8" drive ratchet
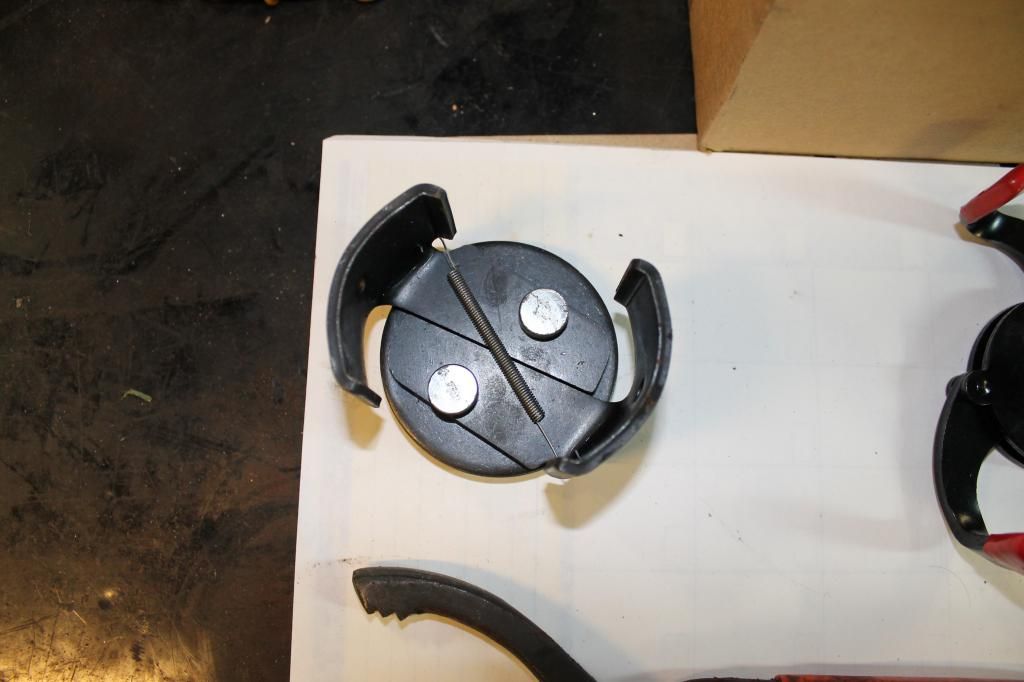
And this is another style of "Jaw Type" that is spring loaded, and my personal favorite to use, so this will be the tool I choose today.
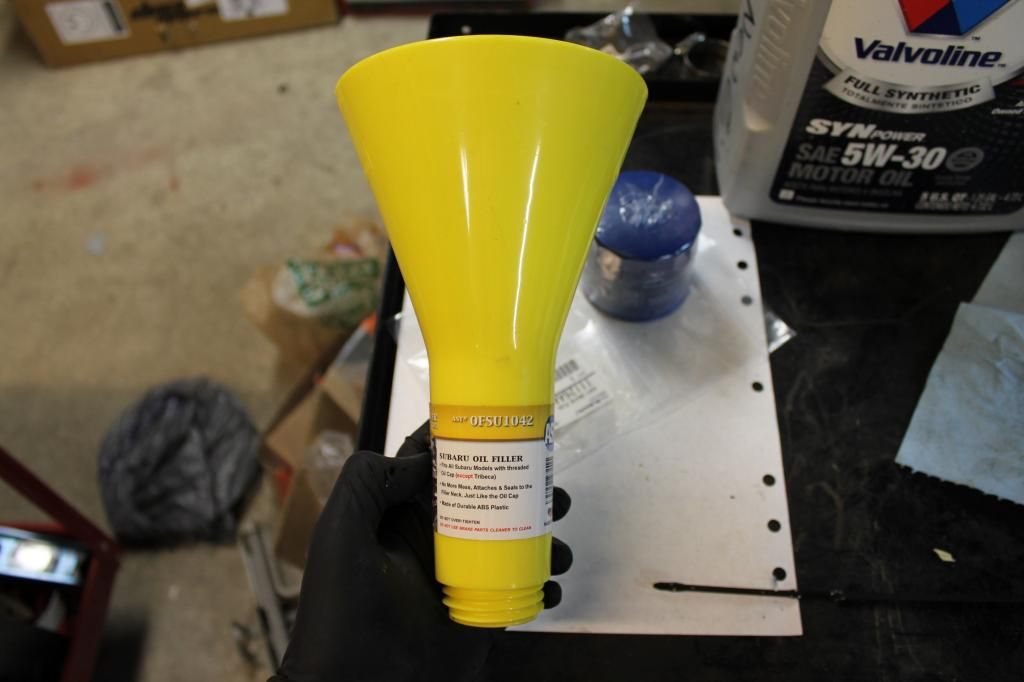
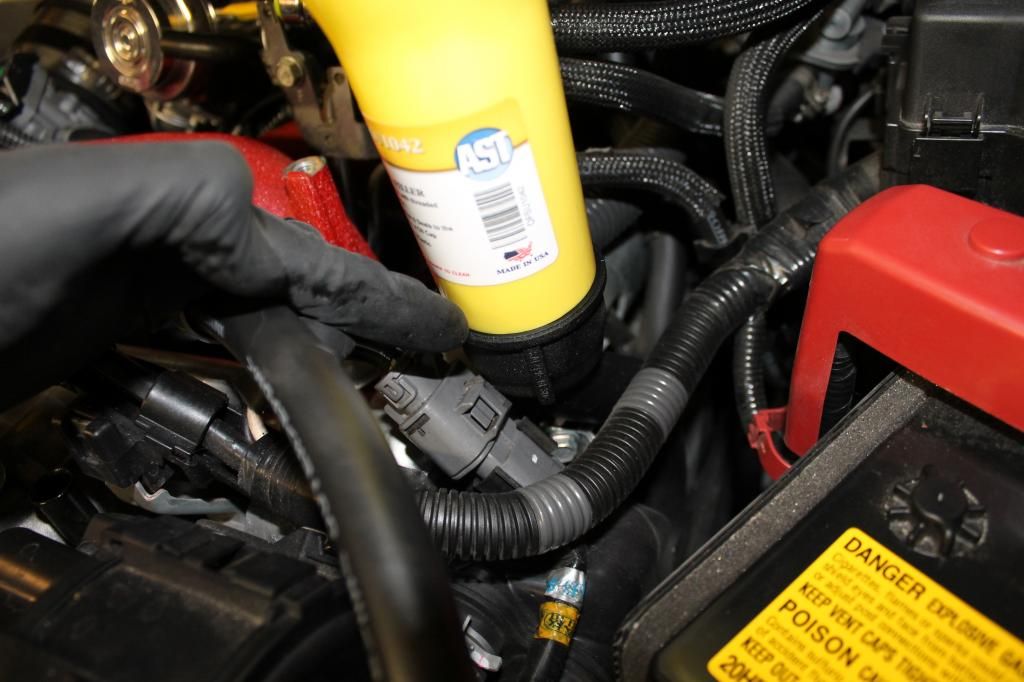
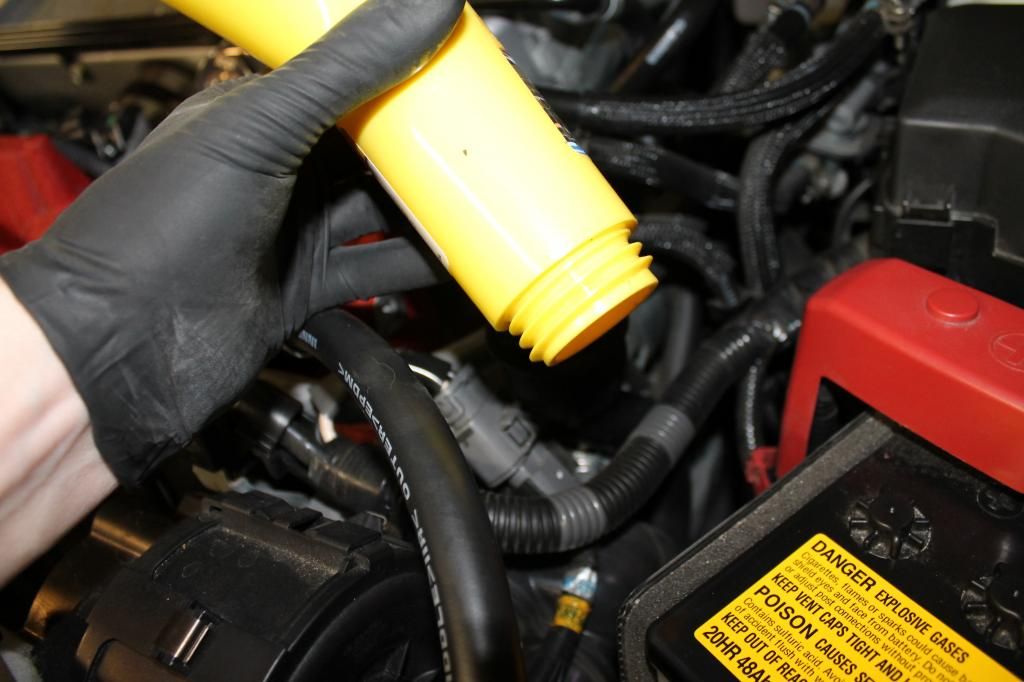
Now one other tool that i consider a specialty tool, since it can only be used with a Subaru, is a special Oil Funnel that screws into the filler neck. Once again since I do this for a living, the offest and cost of this special funnel made it worth the purchase.
For those interested, it is made by a company called Assenmacher and the tool number is AHOFSU1042
Okay now that we have covered tools and Parts lets get down to work.
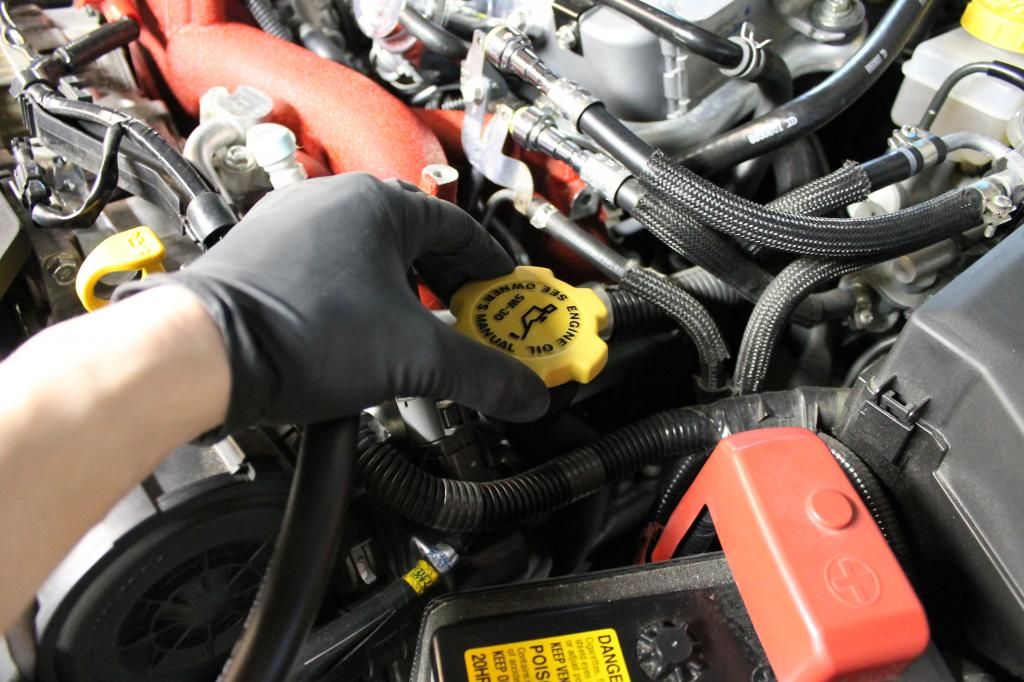
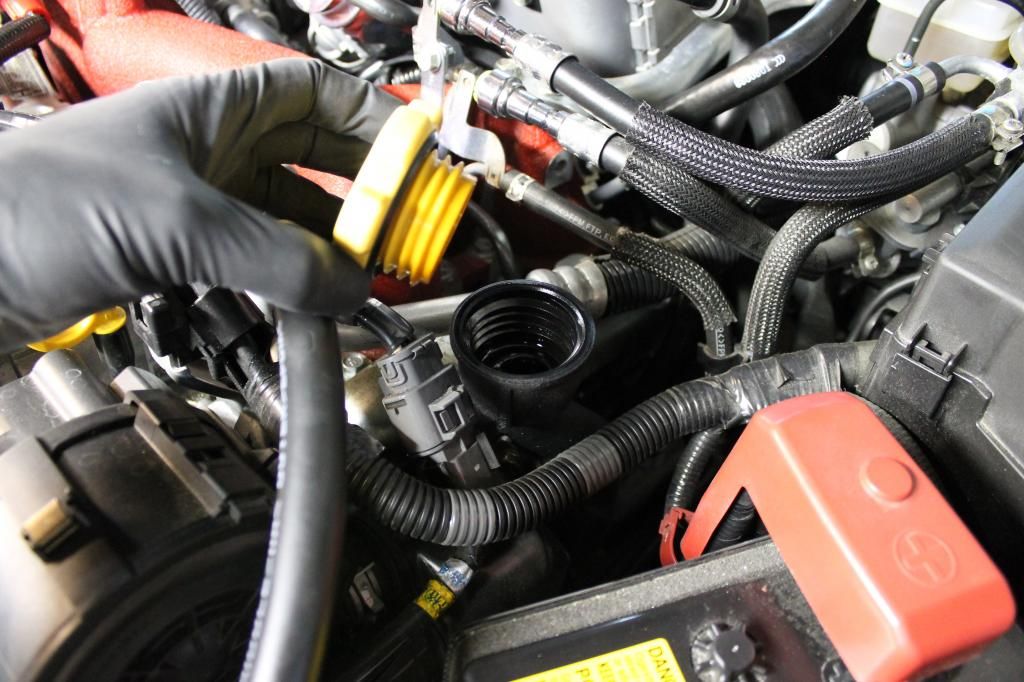
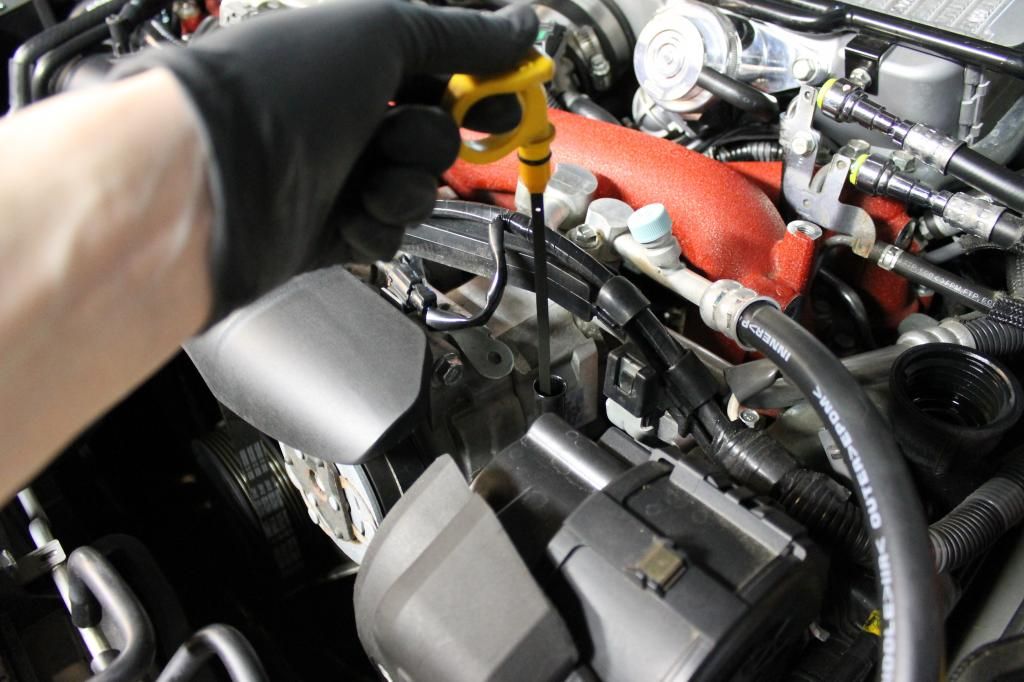
Before we jack up the car, lets open the hood and remove the oil filler cap and dip stick. If this is your first time changing your oil, make a note of where the oil level is at right now. It may help to take a picture of it.
Now lets jack up the front of the car to gain access to the underside.
Refer to this write up on how to safely and properly jack up your car
http://igotasti.com/vBforum/showthread.php/8731-Jacking-your-car-up-for-beginners
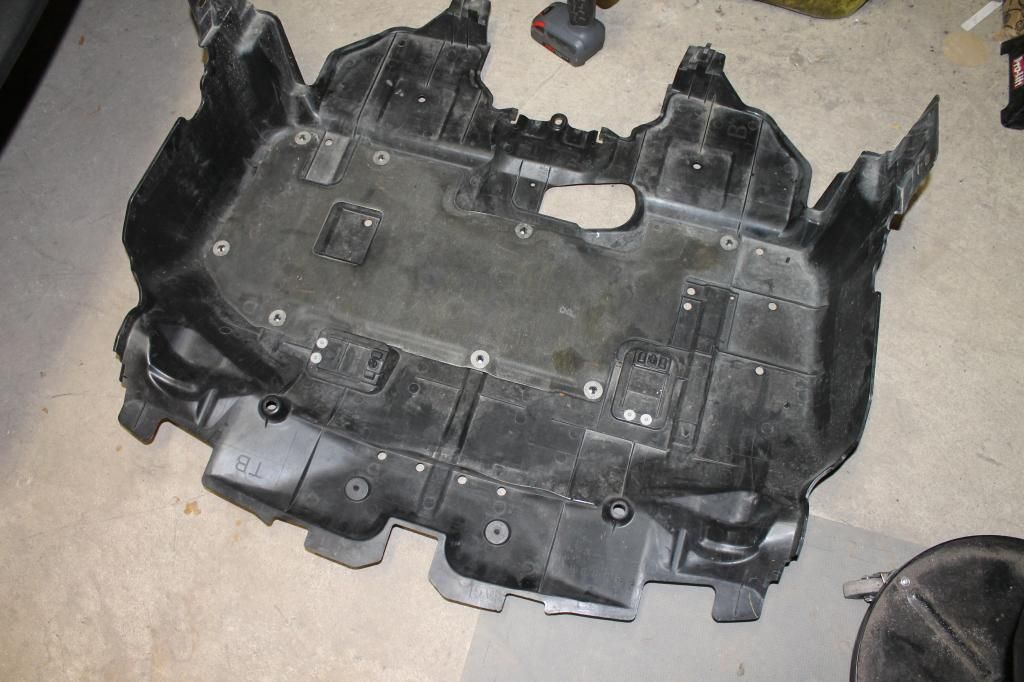
Now that you have the front of the car in the air, lets pull off the plastic undertray. It is held on by 4 clips and three 12mm bolts
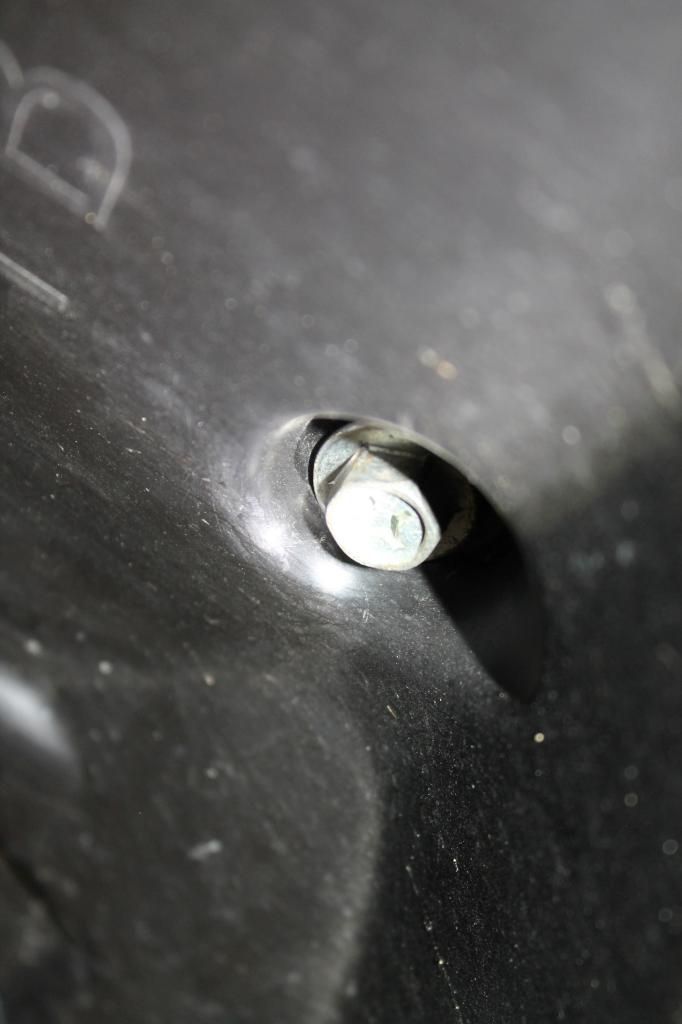
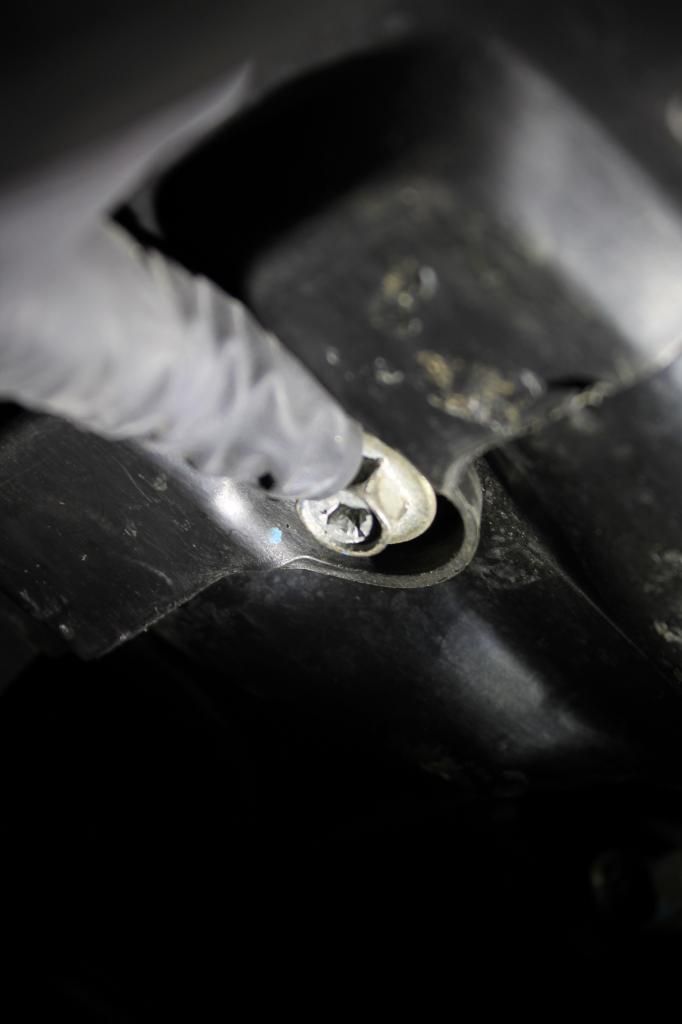
Two of the four clips are located in the wheel wells on each side. Use your flat head screwdriver and remove both of these clips, but if you have the special clip removal pliers it will be alot easier to remove them, because these style of clips have a tendency to be rather stubborn to remove.
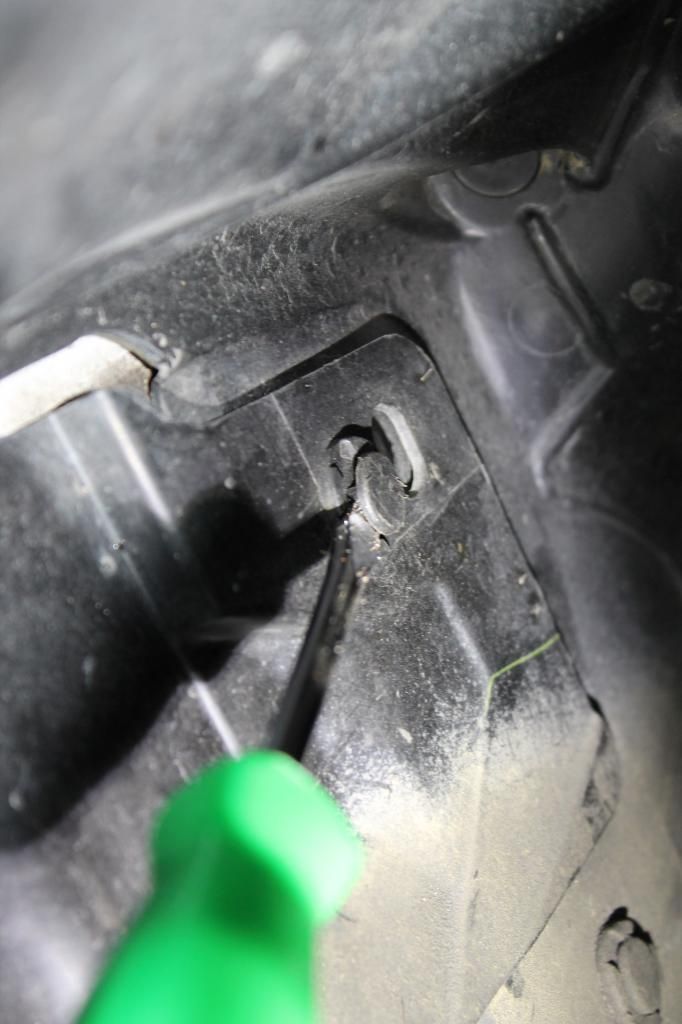
Using a screwdriver
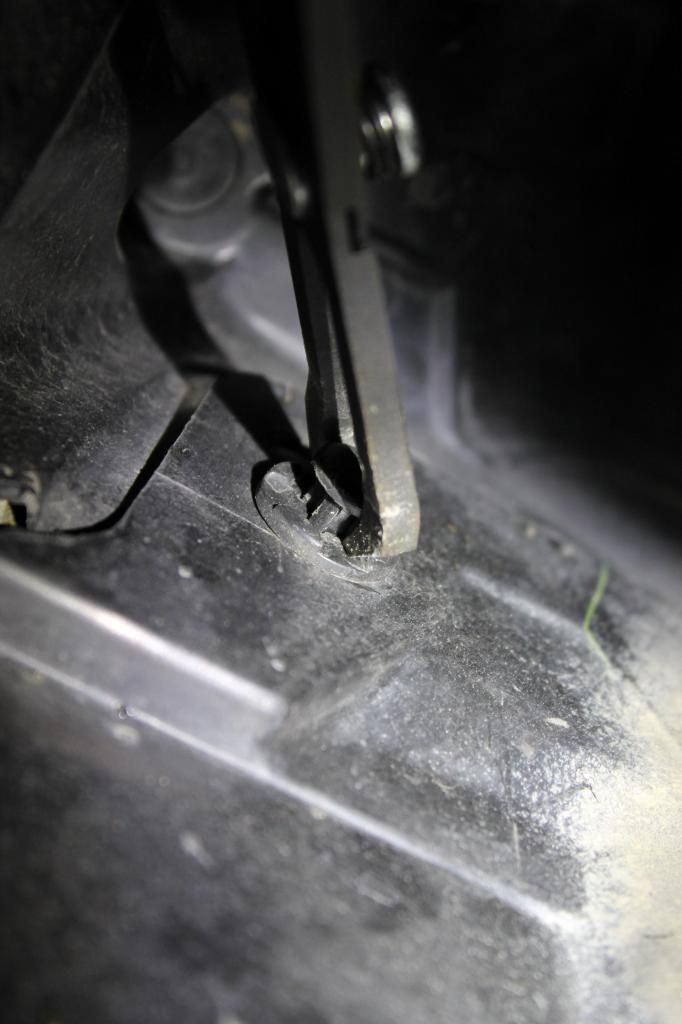
Using the clip removal pliers
The other two clips are on the back side and just slide off. If you do not have these clips that's okay as most of the time they are missing, unless you have a brand new car, then they will most definitely be there.
Now that you have removed all the plastic clips and three 12mm bolts, the undertray should come right off, slide it out from under the car so you have plenty of room to work.
Now slide back under the car and locate the Oil Drain Plug and Oil Filter. Check for any preexisting leaks from these locations. Also check around the turbo oil drain hoses which feed into the oil filter housing for leaks, and check the seal of the oil pan for leaks as well.
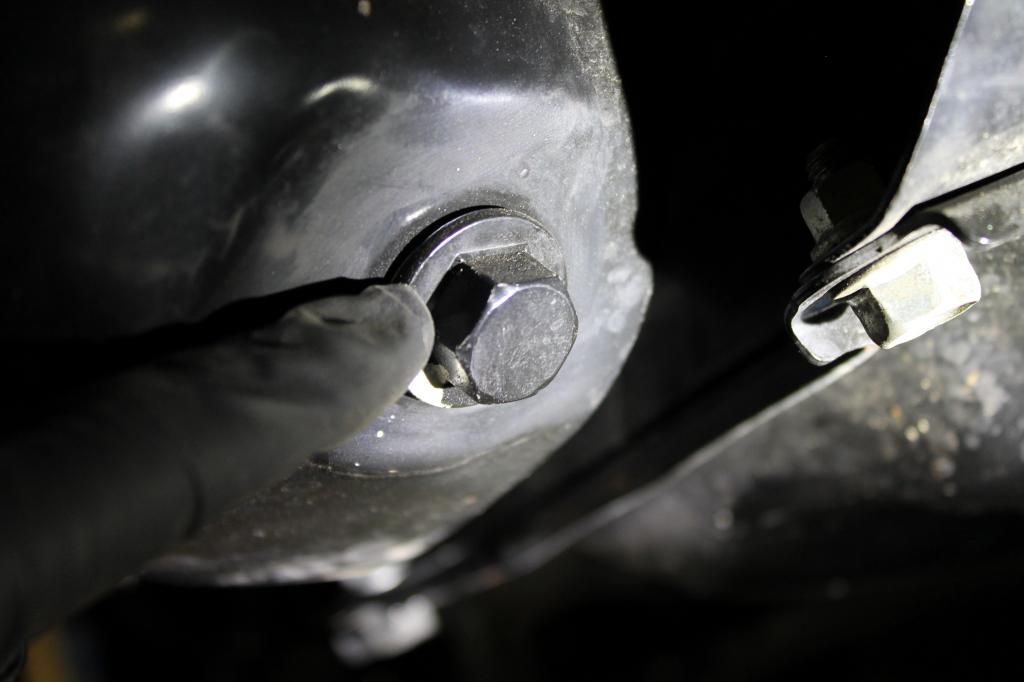
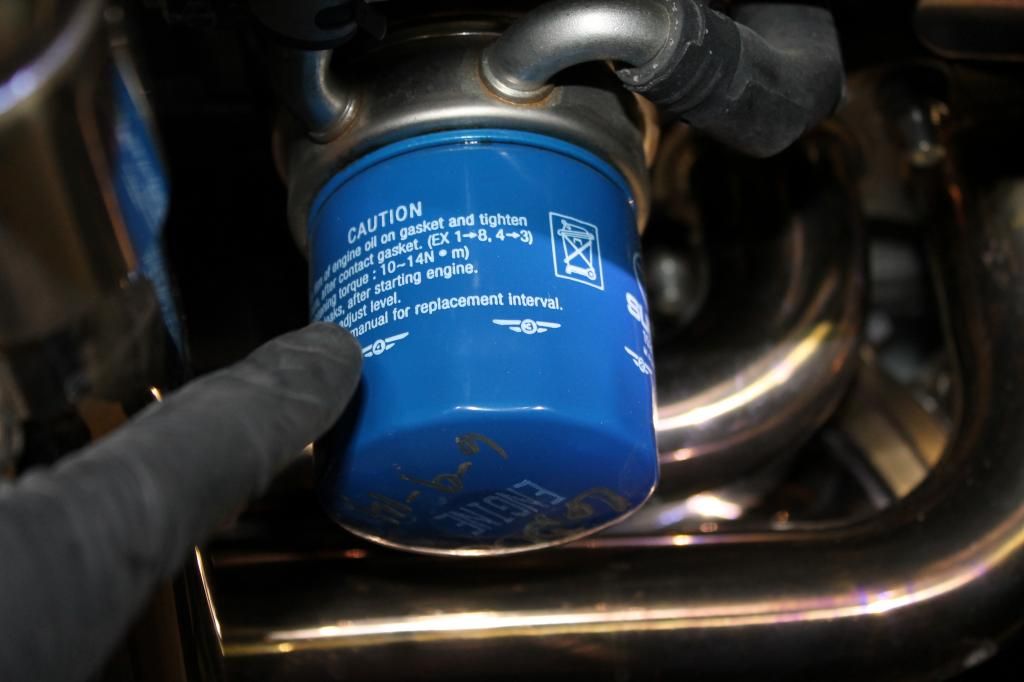
Now that you have inspected the areas mentioned above, its time to place your oil drain catch pan under the car and remove the oil drain plug.
Use your 17mm Wrench or Socket to remove the oil drain plug. Be careful as the oil will be warm if you have recently driven the car.
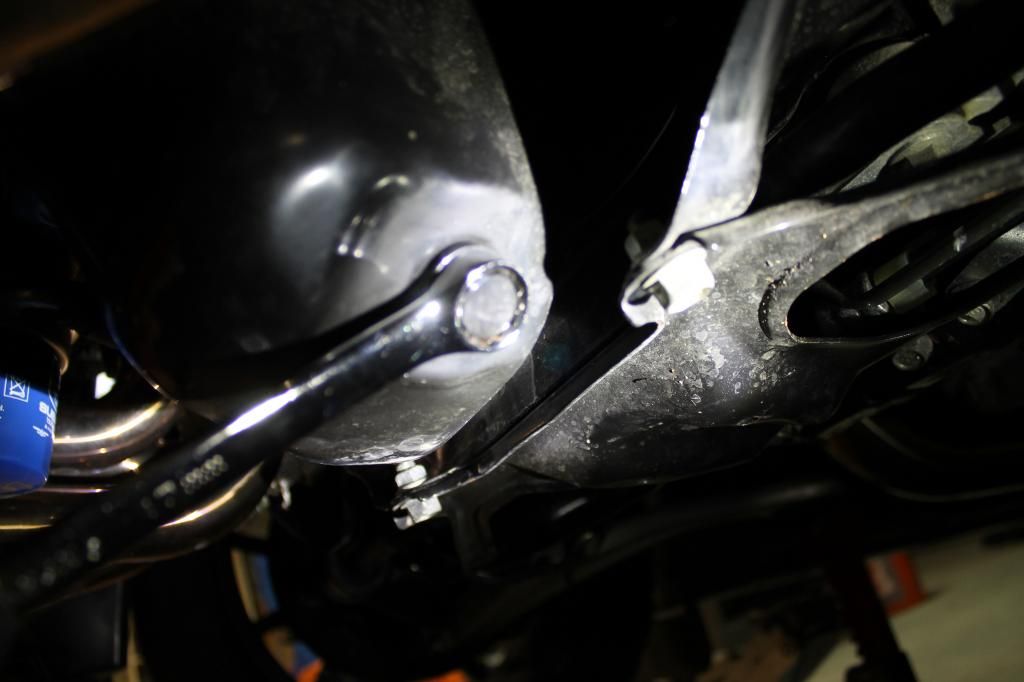
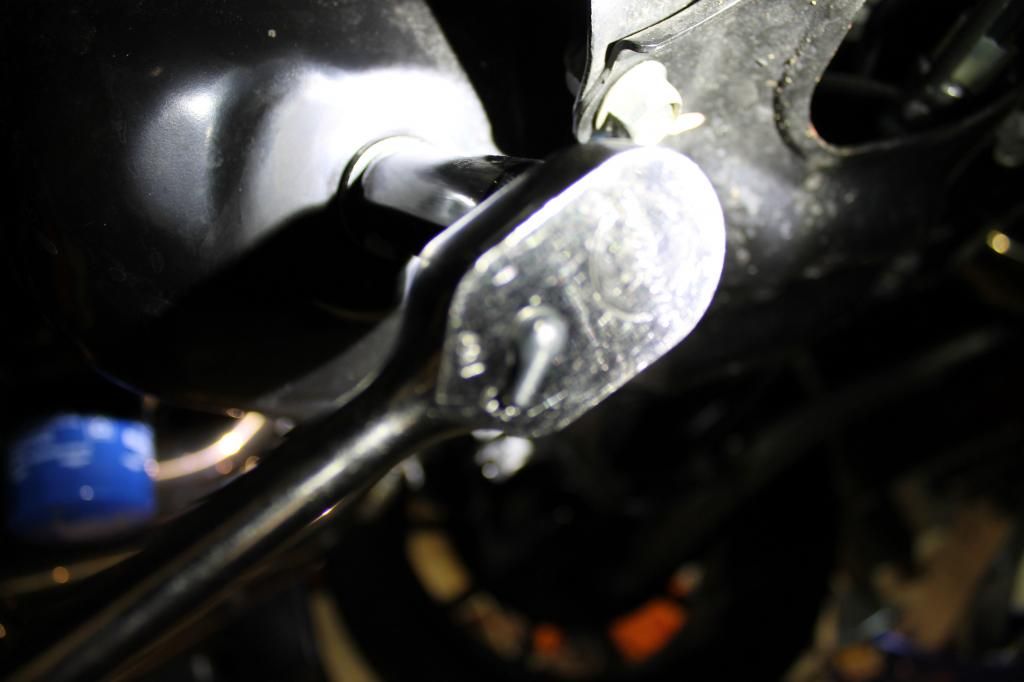
Left to loosen, Right to tighten.
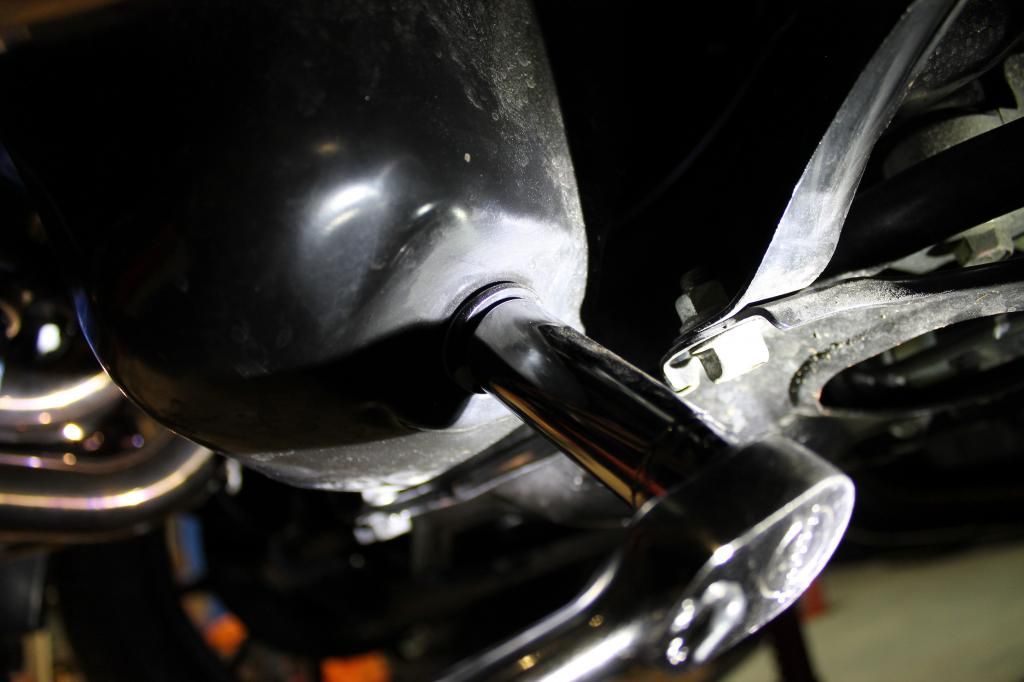
Now that your oil is draining into the pan, take a few minutes to check your tire pressures while the oil is draining into your catch pan.
Now that the oil has been drained into your catch pan, slide your catch pan over and underneath your oil filter.
Get your oil filter removal tool, whether it be the pliers, jaw style or cup style and remove your oil filter. Yes you can probably remove your oil filter by hand, but why strain and struggle for such an easy job like this?
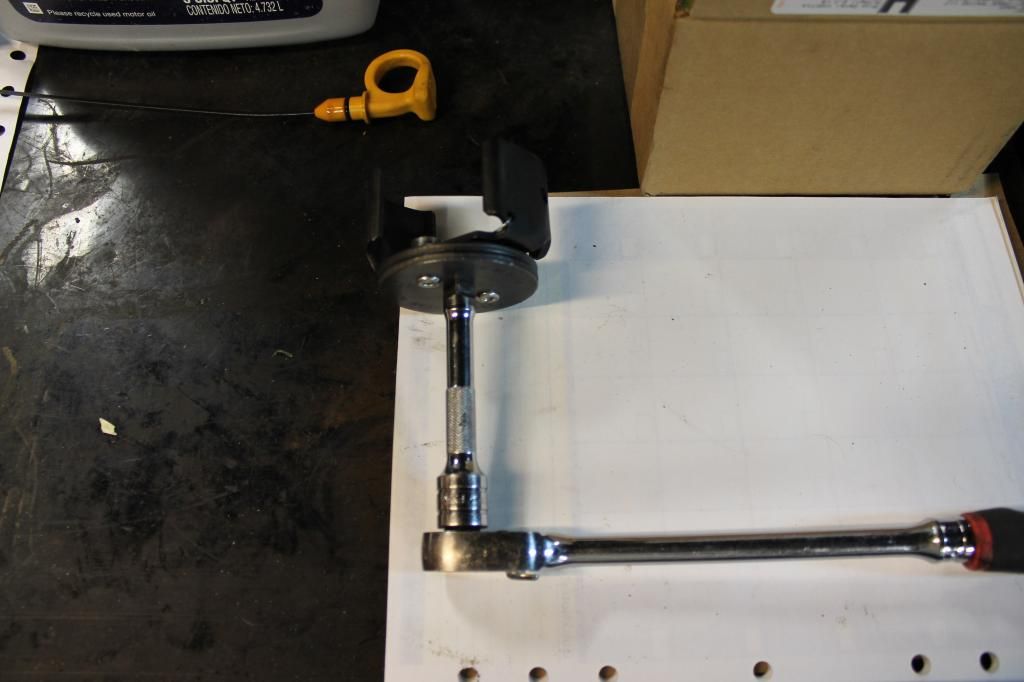
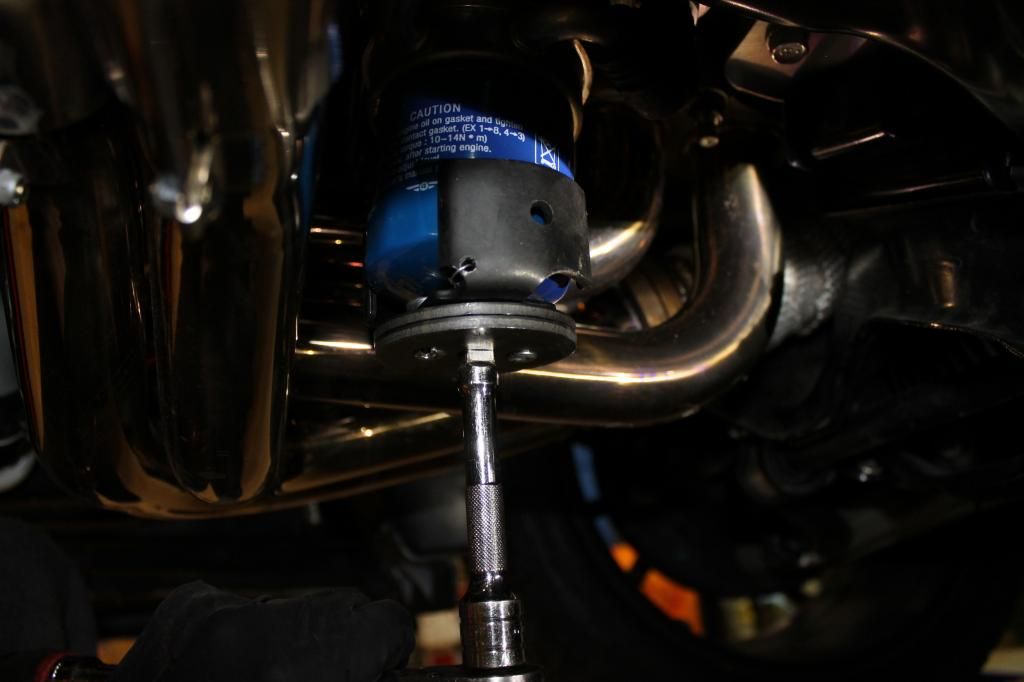
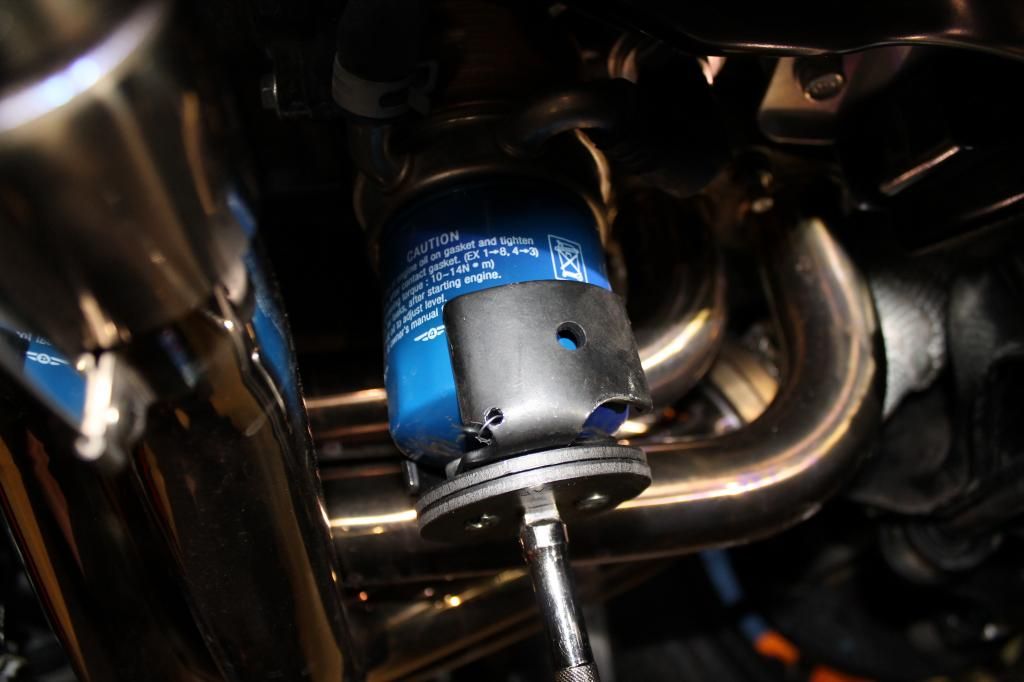
Use the tool to loosen the filter enough to where you can spin it off the filter union by hand and then place it in your oil catch pan.
Check to make sure the rubber gasket that was on the old oil filter isnt still attached to the block. You DO NOT want to double gasket your new oil filter, that will create a massive oil leak and cause engine damage.
Take a rag or paper towel and wipe the oil filter mating surface to make sure its clean and free of any old gasket rubber material.
Get your new oil filter and take it out of its clear plastic wrapping. Take some of your new oil and rub a little bit of it on the rubber ring that you see on the oil filter. That is your oil filter gasket. Make sure it is properly lubricated before installing on your car.
Grab your filter and spin it on by hand until it seats up against the block. Continue to tighten it by hand until your cant turn it anymore. That doesnt mean Hulk it on there, it just means grip it good, and give it a nice good twist. Youll know when its tight.
Now grab your drain plug and remove the old crush washer gasket that is on it. Now get your new crush washer gasket and install it onto the drain plug. You want to change out the crush washer each time to prevent oil leaks from occurring.
Now take your drain plug and thread it back into the oil pan by hand until it contacts the pan.
At this point you can either tighten it down with your wrench or ratchet, but if you want to go a step further like I do, grab your torque wrench if you have one and set it to 32.5 ft lbs of torque. You can also set it to 33 ft lbs of torque if your torque wrench does not read in .5 increments.
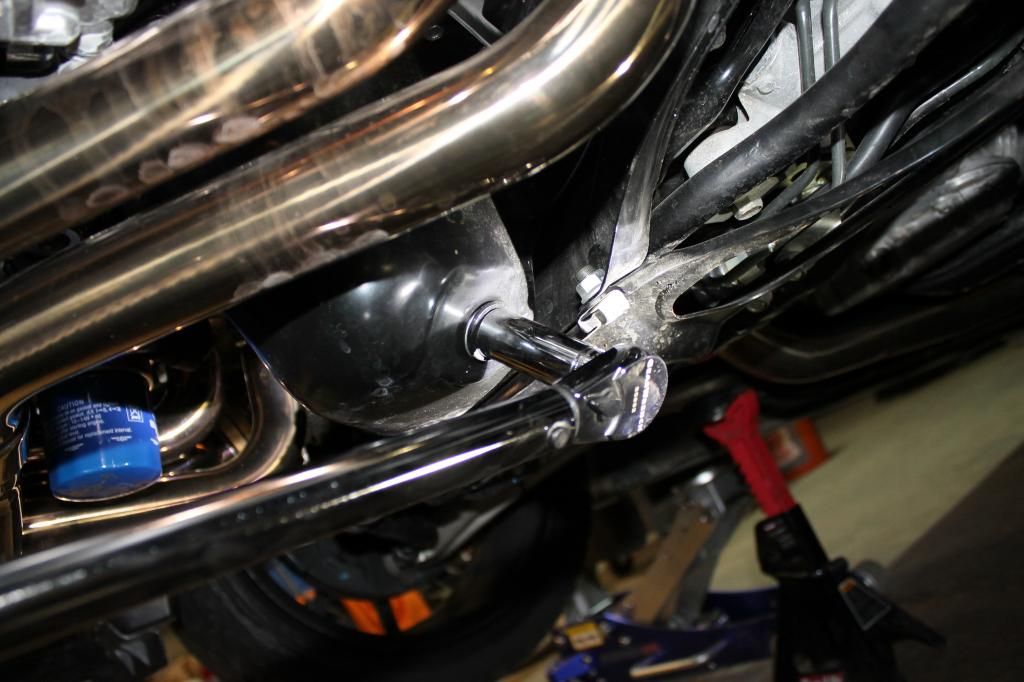
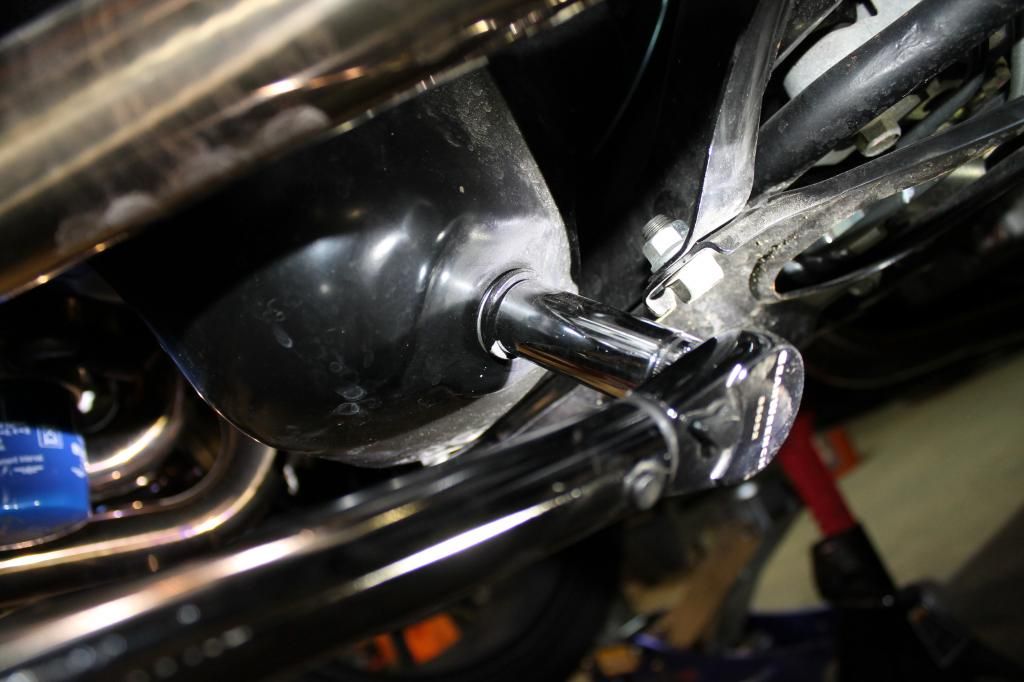
Now that your Drain Plug has been reinstalled with a new crush washer, you can add your new oil.
I use gallon containers, but you can use both individual quarts or go like I do and use a gallon, its a little easier having the special funnel because it gives me two free hands to steady the oil jug.
Now if you check your owners manual it will state you should add 4.2 US Quarts. Start by adding 4 Quarts and then check from there. After you have added your oil, start the car and check for leaks, let it run for about 20 seconds to get everything circulating. Remove the dipstick and check your level and add if necessary. You do not have to be spot on at the full mark, just close to it. You never want to overfill an engine with engine oil. Overfilling is just as bad as not enough. So inbetween full and fill is where you want to be.
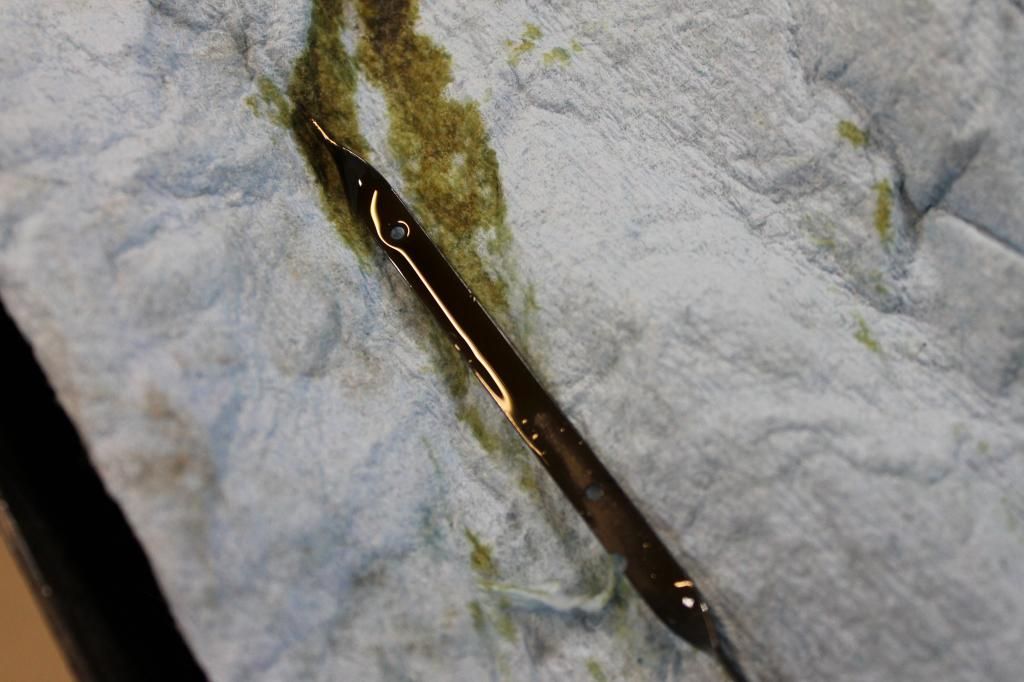
Just like this.
Now that your oil level is satisfactory, you can reinstall your plastic undertray, and let your car off the jack stands and take it for a test drive.
Check your oil level one more time after your test drive and if all is good your all set.
Congrats! You have just completed your oil change on your STi.
Thank You for taking the time to read this, if you have any questions feel free to ask.
TK-421
Welcome to the Newbie Section. Many of you reading this are new STi owners. Whether this is your first Subaru or first STi, you've probably got yourself a laundry list of questions and your wondering where to go. This section was thought of especially for you. There will be information here to help the new owners with your questions and hopefully answer the majority of them. So without further ado, let's get to it shall we?
Today I will be covering how to change your engine oil and oil filter
Things you will need to accomplish this task are:
A New Oil Filter (I use OEM Subaru Oil Filters in all of my cars and my customers cars unless provided with a different filter)
Subaru Part # 15208AA12A

A New Oil Drain Plug Crush Washer (Again I use Subaru OEM Parts)
Subaru OEM Part # 11126AA000

And Your Choice Of Engine Oil

Now lets go over the tools your going to need to accomplish this.
Your going to need:
A 3/8" drive ratchet
17mm socket
12mm socket
Flat Head Screwdriver
Oil Filter Wrench ( we will go over the different types in just a minute )
And a Oil Catch Pan or Equivalent
Optional Tools include
Clip Removal Pliers
3/8" Drive Torque Wrench
17mm Combination Wrench
These 3 Tools are Optional due to the fact that not everyone has these tools available to use. As I do this for a living, I have many tools at my disposal that the average owner would not use or own.


Please note that the Air Impact is for another job, not for this oil change. You Never EVER want to use any power tools/Air Tools with a job like this.
Now above I talked about Oil Filter Wrenches, lets go over the different types of filter wrenches. There are 4 main types, A Cup Style, Claw Style, Band Style and Special Pliers that are made for removing oil filters.
I own two of the four types

These are the special pliers

This is one style of "Jaw Style" Wrench that fits on the square drive end of a 3/8" drive ratchet

And this is another style of "Jaw Type" that is spring loaded, and my personal favorite to use, so this will be the tool I choose today.
Now one other tool that i consider a specialty tool, since it can only be used with a Subaru, is a special Oil Funnel that screws into the filler neck. Once again since I do this for a living, the offest and cost of this special funnel made it worth the purchase.
For those interested, it is made by a company called Assenmacher and the tool number is AHOFSU1042


Okay now that we have covered tools and Parts lets get down to work.
Before we jack up the car, lets open the hood and remove the oil filler cap and dip stick. If this is your first time changing your oil, make a note of where the oil level is at right now. It may help to take a picture of it.


Now lets jack up the front of the car to gain access to the underside.
Refer to this write up on how to safely and properly jack up your car
http://igotasti.com/vBforum/showthread.php/8731-Jacking-your-car-up-for-beginners
Now that you have the front of the car in the air, lets pull off the plastic undertray. It is held on by 4 clips and three 12mm bolts


Two of the four clips are located in the wheel wells on each side. Use your flat head screwdriver and remove both of these clips, but if you have the special clip removal pliers it will be alot easier to remove them, because these style of clips have a tendency to be rather stubborn to remove.

Using a screwdriver

Using the clip removal pliers
The other two clips are on the back side and just slide off. If you do not have these clips that's okay as most of the time they are missing, unless you have a brand new car, then they will most definitely be there.
Now that you have removed all the plastic clips and three 12mm bolts, the undertray should come right off, slide it out from under the car so you have plenty of room to work.

Now slide back under the car and locate the Oil Drain Plug and Oil Filter. Check for any preexisting leaks from these locations. Also check around the turbo oil drain hoses which feed into the oil filter housing for leaks, and check the seal of the oil pan for leaks as well.


Now that you have inspected the areas mentioned above, its time to place your oil drain catch pan under the car and remove the oil drain plug.
Use your 17mm Wrench or Socket to remove the oil drain plug. Be careful as the oil will be warm if you have recently driven the car.


Left to loosen, Right to tighten.

Now that your oil is draining into the pan, take a few minutes to check your tire pressures while the oil is draining into your catch pan.
Now that the oil has been drained into your catch pan, slide your catch pan over and underneath your oil filter.
Get your oil filter removal tool, whether it be the pliers, jaw style or cup style and remove your oil filter. Yes you can probably remove your oil filter by hand, but why strain and struggle for such an easy job like this?


Use the tool to loosen the filter enough to where you can spin it off the filter union by hand and then place it in your oil catch pan.
Check to make sure the rubber gasket that was on the old oil filter isnt still attached to the block. You DO NOT want to double gasket your new oil filter, that will create a massive oil leak and cause engine damage.
Take a rag or paper towel and wipe the oil filter mating surface to make sure its clean and free of any old gasket rubber material.
Get your new oil filter and take it out of its clear plastic wrapping. Take some of your new oil and rub a little bit of it on the rubber ring that you see on the oil filter. That is your oil filter gasket. Make sure it is properly lubricated before installing on your car.
Grab your filter and spin it on by hand until it seats up against the block. Continue to tighten it by hand until your cant turn it anymore. That doesnt mean Hulk it on there, it just means grip it good, and give it a nice good twist. Youll know when its tight.
Now grab your drain plug and remove the old crush washer gasket that is on it. Now get your new crush washer gasket and install it onto the drain plug. You want to change out the crush washer each time to prevent oil leaks from occurring.
Now take your drain plug and thread it back into the oil pan by hand until it contacts the pan.
At this point you can either tighten it down with your wrench or ratchet, but if you want to go a step further like I do, grab your torque wrench if you have one and set it to 32.5 ft lbs of torque. You can also set it to 33 ft lbs of torque if your torque wrench does not read in .5 increments.


Now that your Drain Plug has been reinstalled with a new crush washer, you can add your new oil.
I use gallon containers, but you can use both individual quarts or go like I do and use a gallon, its a little easier having the special funnel because it gives me two free hands to steady the oil jug.
Now if you check your owners manual it will state you should add 4.2 US Quarts. Start by adding 4 Quarts and then check from there. After you have added your oil, start the car and check for leaks, let it run for about 20 seconds to get everything circulating. Remove the dipstick and check your level and add if necessary. You do not have to be spot on at the full mark, just close to it. You never want to overfill an engine with engine oil. Overfilling is just as bad as not enough. So inbetween full and fill is where you want to be.

Just like this.
Now that your oil level is satisfactory, you can reinstall your plastic undertray, and let your car off the jack stands and take it for a test drive.
Check your oil level one more time after your test drive and if all is good your all set.
Congrats! You have just completed your oil change on your STi.
Thank You for taking the time to read this, if you have any questions feel free to ask.
TK-421

